How To Maintain The Exterior Of Your Microwave Oven
To maintain the exterior of your microwave oven, follow these steps:
- Regular Cleaning
- Avoiding Harsh Chemicals
- Wiping Down The Exterior
- Avoiding Abrasive Materials
- Cleaning The Control Panel
- Removing Grease And Spills
- Cleaning The Ventilation System
- Replacing Lightbulbs
- Inspecting The Door Gasket
- Checking The Electrical Components
How To Maintain The Exterior Of Your Microwave Oven
1. Regular Cleaning
As a microwave oven maintenance expert, I always recommend that people dust their appliances off regularly. Not only does this help prevent dirt and grime from building up on the exterior of your appliance, but also helps to keep it looking new for longer. The best way to maintain the exterior of your microwave is with regular preventative cleanings. Taking a few minutes each week to give your microwave a quick once-over will go a long way in preserving its look and finish over time.
To do so, simply use a damp cloth or sponge to wipe down any visible areas of dirt or dust build-up. Additionally, you can use an all-purpose cleaner or diluted vinegar solution if necessary. Regular cleaning will help ensure that your kitchen stays spic and span while keeping your microwave looking great!
2. Avoiding Harsh Chemicals
It’s possible to clean your microwave oven without harsh chemicals – you can use natural alternatives like white vinegar and baking soda. When cleaning, make sure you use soft cloths to avoid scratching the surface.
Natural Cleaning Alternatives
If you’re looking for a way to maintain the exterior of your microwave oven without using harsh chemicals, look no further than natural cleaning alternatives! Eco-friendly and vinegar-based options are great for avoiding any potentially dangerous ingredients.
With just a few simple steps, you can keep your appliance clean in no time – all while keeping it safe and healthy. Plus, these methods often work better on tough grease stains than commercial products do!
So don’t be afraid to get creative – there’s nothing like an all-natural alternative to give your microwave oven that extra sparkle.
Cleaning With Soft Cloths
Now that you’ve ditched the chemicals, it’s time to look into what soft cloths can do for your microwave oven. With a few simple steps and a bit of elbow grease, you can easily polish away any dirt or grime with ease. All you need is two different types of microfiber rags: one for dusting and another for polishing.
Start by using the first rag to remove any particles from surfaces like buttons, vents, and knobs – then use the second rag in circular motions to really make sure everything shines! The key here is to use gentle pressure and avoid putting too much strain on more fragile parts of the appliance.
And ta-da – without resorting to harsh chemicals, your microwave will be looking as good as new in no time.
3. Wiping Down The Exterior
The exterior of a microwave is an often overlooked but essential part of kitchen maintenance. It can be easy to forget that the shiny surfaces and well-protected finish are just as important in keeping your oven clean as wiping down the interior walls. Symbolically, shining up these surfaces can make you feel like you’ve done something special for yourself and your home.
The following steps will help maintain the look of your oven:
- Polishing surfaces with a soft cloth to remove any dirt or dust particles.
- Applying stainless steel cleaner or polish to keep surfaces looking new.
- Cleaning off fingerprints by using a mild detergent or rubbing alcohol on a damp cloth.
- Protecting finishes with wax or sealant so they stay looking good over time.
Maintaining your microwave’s exterior may not sound glamorous, but it’s necessary to ensure everything runs smoothly and looks great when it comes time to use it!
4. Avoiding Abrasive Materials
Now that you have wiped down the exterior of your microwave oven, it is important to understand how to polish safely and prevent rusting.
To keep your appliance clean and looking as new for longer, use a soft cloth or microfiber towel with mild soap and water to gently scrub away any dirt or grime. Avoid using abrasive materials such as steel wool, scouring pads, chemical cleaners or other harsh detergents; these can scratch the surface of your oven, leaving marks behind.
Polishing your microwave oven is also an important step in keeping its exterior from turning dull over time. Use non-abrasive products like car wax and car polishes on surfaces made out of stainless steel and chrome for best results.
This will help restore luster while protecting against scratches that could occur due to everyday wear and tear. In addition, applying a layer of paint protectant or silicone spray can help guard against corrosion caused by moisture in the air which can lead to rusting if left unchecked.
5. Cleaning The Control Panel
Maintaining the exterior of your microwave oven is important for keeping it looking neat and ensuring its longevity. To clean the control panel, you’ll need a few supplies: a soft cloth, some mild detergent or all-purpose cleaner, and a gentle polishing agent.
Start by wiping down the surface with the damp cloth and some cleaner to remove any dirt or grime. Then use the polishing agent on areas that need extra attention, like around buttons or knobs. Make sure to be careful when dusting around these buttons so as not to damage them! Afterward, give everything one final wipe with the dry cloth to ensure no streaks remain.
Cleaning your microwave’s control panel should now be simple and easy – just remember:
- Use a soft cloth
- Apply mild detergent or all-purpose cleaner
- Polish surfaces and dust buttons carefully
- Wipe everything down with a dry cloth.
6. Removing Grease And Spills
Now that the control panel is all cleaned up and looking as good as new, it’s time to take on some of those tougher stains. Grease and spills can build up inside the microwave oven over time, so it’s important to give them a deep scrubbing every once in awhile.
There are several methods you can use:
| Method | Description |
|---|---|
| Wipe down with warm water | Use a damp cloth or sponge to wipe away any grease or residue from the interior surfaces. Make sure to get into corners and crevices where dirt builds up quickly. |
| Baking soda paste | Create a paste using one part baking soda and two parts water, then apply this mixture directly onto spill areas. Let sit for 5-10 minutes before wiping off with a dry cloth. |
| Vinegar and lemon juice solution | Mix equal amounts of vinegar and lemon juice together in a spray bottle then liberally mist around affected areas of your microwave oven. Allow solution to penetrate for 10 minutes before wiping clean with a damp rag. |
These techniques should help remove most stains but if they persist, try repeating the process until satisfied with results. If necessary, you may need to resort to harsher chemicals such as bleach or ammonia-based cleaners – just make sure to do this safely by wearing protective gloves and eye wear! With these tips, you’ll be able keep your microwave oven looking its best without any hassle at all!
7. Cleaning The Ventilation System
Ah, the dreaded deep cleaning of your microwave oven. I know it’s not what you had in mind when you purchased this beautiful workhorse, but trust me – taking a few extra steps to make sure that all the air filters are clean and clear is worth its weight in gold! Unfortunately, if you don’t take care of them regularly enough, those pesky dust mites can quickly build up and start obstructing the flow of air through your appliance.
If left unchecked for too long, this could lead to some serious problems down the line. So trust me when I say that regular maintenance here is key. Don’t wait until something goes wrong – get yourself into a routine of deep cleaning those air filters every once in awhile so that your appliance stays running like new!
8. Replacing Lightbulbs
When it comes to maintaining the exterior of your microwave oven, replacing lightbulbs is an important part of keeping it in top condition. It’s easy enough to do yourself; all you need is a new bulb and some basic tools.
First, turn off the power source before unscrewing the old bulb from its socket. Remember that different models may require slightly different installation methods for their bulbs – so be sure to check your manual! When installing the replacement bulb, make sure not to apply too much pressure when tightening screws or other parts.
Doing so could damage internal components and result in costly repairs down the line. To ensure everything is secure, give each component one final inspection after fitting them into place. With these few simple steps you’ll have no problem keeping your microwave oven looking as good as new!
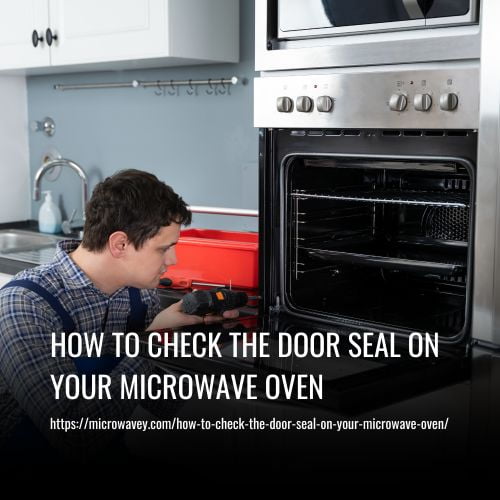
9. Inspecting The Door Gasket
First thing’s first, let’s check the door gasket for any tears, dirt or debris. If you come across something that doesn’t look right, it’s time to replace it. I’d recommend inspecting the gasket regularly to ensure it’s in good condition – that way, you can keep your microwave oven working properly.
Check For Tears
It’s important to inspect the door gasket of your microwave regularly, as it plays a major role in keeping the heat inside. So take a closer look and make sure it isn’t torn or ripped – if you spot any holes, fixing them right away will help prevent further damage! It only takes a few minutes and can save you time & money in the long run.
Don’t forget to check around the corners too; these are usually where tears start appearing first. A quick inspection once every couple of months should be enough to keep things running smoothly.
Dirt Or Debris
It’s also important to make sure that there isn’t any debris or dirt buildup on the door gasket. Even if you don’t see any visible signs of damage, it can still cause problems over time. To prevent this from happening, try and wipe down the seal with a damp cloth every once in awhile.
This will help keep it clean and free of any stains or debris, so it continues to work properly for years to come. And if you do spot some stubborn marks or blemishes, just use a simple cleaning solution to remove them quickly – no scrubbing necessary! Taking these precautions now will save you time & money later on. So take care when inspecting your microwave door gasket and keep it running smoothly!
Replace If Necessary
Once you’ve taken a closer look at your door gasket, it’s time to decide if replacing is necessary. If the seal looks too worn or damaged, then buying new may be the best option for keeping your microwave running properly. It’s important to keep in mind that repair costs can add up quickly, so consider the buying tips before making any decisions.
Be sure to shop around and compare prices – there are many affordable options out there! Plus, with proper maintenance and care of the new gasket, it should last you a long time. All in all, inspecting your gasket and replacing if necessary will help ensure that your microwave continues working safely and efficiently.
10. Checking The Electrical Components
Before checking the electrical components of your microwave, it’s important to make sure all connections are properly secured and there is no visible damage. First, you should unplug the oven and look for any loose wires or broken parts that might be causing problems. Once everything looks secure, plug in the oven and test the current with a voltage meter. If the voltage reading is too low or high, then you may need to adjust the power supply of your appliance.
Next, check all wiring connections inside the unit to ensure they are connected correctly and not damaged. This will help prevent electric shock hazards from occurring when using your oven. Finally, if at any point during this process something does not seem right or safe, do not hesitate to call an appliance repair technician for help.
FAQs
Cleaning your microwave oven is like giving it a fresh coat of paint; you need to do it regularly to keep its exterior looking pristine. To ensure that your appliance remains in top condition, it’s important to use the right cleaning products and perform regular maintenance. It’s advised to clean your microwave at least once every two weeks with warm water and mild soap or another appropriate cleaner. Wipe down the interior and exterior surfaces carefully with a soft cloth, paying special attention to any stubborn stains or areas that accumulate food debris. If necessary, deep clean by running a bowl of lemon juice diluted in water in the microwave for several minutes before wiping off the grime. With these tips, you can easily maintain the exterior of your microwave oven and avoid costly repairs down the line.
Cleaning grease and spills off your microwave oven should be done regularly to keep it looking its best. The best way is to use a combination of drying techniques and steam cleaning for tougher messes. Start by wiping down the exterior with a damp cloth or paper towel, then follow up with an all-purpose cleaner if necessary. For tough food stains, you can fill a bowl with water and heat it in the microwave until it’s steaming hot. Then carefully remove the bowl from the microwave, dip a clean cloth into the steaming water, and use this as a natural steam cleaner to loosen stuck on food particles and grime. Rinse off any remaining residue with warm water afterwards.
Coincidentally, the question of whether it’s safe to use abrasive materials on your microwave oven is an important one when it comes to maintaining its exterior. As a maintenance expert would tell you, using abrasive materials could potentially damage your appliance and even cause rusting. The best way to restore shine while avoiding rust is by carefully wiping down the surface with cleansers specifically made for microwaves. Be sure that any sponge or cloth used is soft in order to avoid scratching the outer layer.
If the lightbulb in your microwave oven stops working, you’ll need to replace it. First, unplug the appliance and test its voltage to make sure that there is no power running through it. Then remove the cover of the bulb compartment – usually just by unscrewing a few screws – and take out the old bulb with needle-nose pliers. Once you have a replacement bulb, carefully install it into the holder and reinstall the cover before plugging your microwave back in. With this simple fix, you can get your microwave oven up and running again quickly!
If you have a microwave oven, it’s important to make sure your ventilation system is properly maintained. For instance, if you don’t regularly clean and protect the vents on your appliance from condensation buildup, it could cause major damage down the road. As an experienced maintenance expert, I highly recommend doing this step as part of regular cleaning – it just takes a few minutes and can help extend the life of your microwave oven significantly.
Conclusion
In conclusion, proper maintenance of your microwave oven is key – it will save you time, money and stress in the long run! By following our advice you can be confident that your appliance remains safe and in perfect condition for years to come!