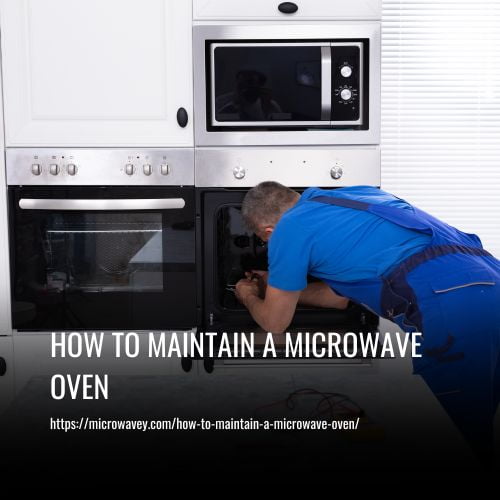
How To Maintain A Microwave Oven
Proper maintenance can not only extend the lifespan of your microwave oven but also ensure that your food is cooked evenly and safely. From cleaning to simple troubleshooting, there are a few key steps you can take to keep your microwave oven in top condition.
To maintain a microwave oven, follow these steps:
- Cleaning The Inside Of The Microwave
- Vacuuming The Vents
- Unplugging The Microwave
- Checking The Door Seals
- Replacing The Charcoal Filter
- Replacing The Turntable Motor
- Replacing The Light Bulb
- Replacing The Roller Ring
- Replacing The Door Handle
- Troubleshooting Common Issues
How To Maintain A Microwave Oven
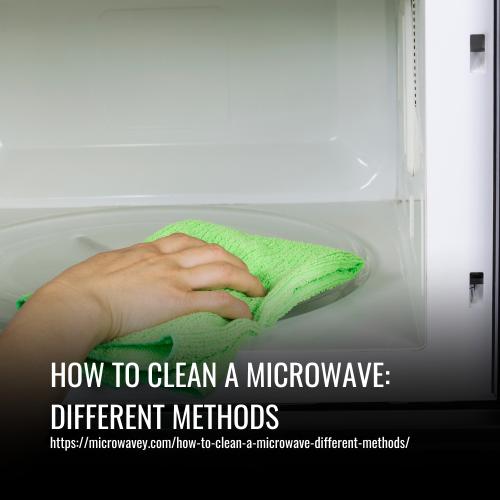
1. Cleaning The Inside Of The Microwave
As a microwave oven maintenance expert, I always recommend wiping the surfaces of your microwave at least once a week with warm soapy water. This will help to keep it looking nice and clean as well as keeping any germs away from your food! It’s also important to make sure you unplug the appliance before cleaning it for safety reasons. Don’t forget to pay attention to places like hinges and door handles that get touched often but might be overlooked when cleaning.
Additionally, if you ever experience troubleshooting issues such as sparking or strange smells coming from the microwave make sure you contact an oven maintenance specialist right away. These signs can indicate something more serious is going on inside, which should not be ignored.
Taking care of these problems quickly can prevent further damage and costly repairs in the future. Keeping up with regular maintenance checks can ensure your family stays safe while enjoying all of your favorite dishes cooked in the comfort of your own home!
2. Vacuuming The Vents
Well, after all that time spent cleaning the inside of your microwave oven, don’t forget to attend to those pesky vents! Vacuuming them up is a must if you want your appliance to run optimally. After all, dusting those vents will allow for better airflow and ensure your machine runs smoothly – no one wants an appliance that’s barely able to heat up their pizza roll in 30 seconds flat!
In order to do this correctly, be sure to use a vacuum with an attachment specifically designed for these areas. Don’t forget to move the attachments around each vent opening so as not to miss any hidden spots where dirt may have accumulated.
And when you’re done vacuuming, take some extra precautions by checking the air flow from each vent just in case something got lodged in there during the process. Keeping your microwave clean and operational is always worth it!
3. Unplugging The Microwave
It’s important to properly power off the microwave oven before attempting any maintenance. Make sure that it is unplugged from all outlets and sources of electricity, and take a few extra safety precautions while you’re at it – like double-checking that no cords are still connected or frayed in any way. Additionally, make sure not to touch any internal parts with your bare hands as this could potentially cause serious damage or injury.
Once the microwave oven has been safely disconnected from its power source, you can begin cleaning and performing routine maintenance on the appliance. Be sure to use only non-abrasive cleaners when wiping down exterior surfaces, such as mild soaps and lukewarm water. Also, do not use harsh chemicals around electrical components inside the microwave oven as doing so may lead to permanent malfunctioning!
4. Checking The Door Seals
It’s commonly believed that heat leakage is the main cause of a microwave oven not working properly. However, this isn’t always true – sometimes it could be due to improper door seals. To make sure your appliance works optimally, let’s inspect the seal integrity of your microwave oven.
I recommend doing a visual inspection first and look for any signs of wear or damage such as cracks in the rubber seal around the edges of the door. If there are any irregularities, you should replace the entire seal right away with an exact replacement part from your manufacturer or supplier.
You can also check if air is leaking out by holding a piece of paper near each side while running your unit on high power mode – if there’s good seal integrity, then no air should pass through the gap between the door and frame!
5. Replacing The Charcoal Filter
Now that the door seals have been checked, it’s time to move on to replacing the charcoal filter. It’s important to check for leaks regularly and ensure your microwave oven is running safely and efficiently.
Here are three steps you must take when replacing a charcoal filter:
- Identify where the leak is coming from – this can be done by visually inspecting around the edges of the doors, or using an infrared thermometer to detect hot spots in areas with poor insulation;
- Unscrew any screws holding the old filter in place and gently remove it;
- Install a new filter by screwing it into place and ensuring that all seams are sealed properly.
Once you’ve taken these three steps, you’re ready to start using your newly filtered microwave oven! Be sure to continue checking for microwaves leaks every few months so that you can maintain safe operation over time.
6. Replacing The Turntable Motor
Replacing the turntable motor is one of the more common maintenance tasks that must be performed on a microwave oven. The first step in this process is to remove the old motor and then install the new one. This can be done by unscrewing the screws holding it in place, taking out any other components connected to it, such as wires or bolts, before removing the motor itself.
Once you have installed the new motor, testing it should be your next priority. In order to do this effectively, make sure all connections are secure and that there’s no damage to any of them before plugging in power and running a test cycle. When everything checks out okay, replace all parts you removed earlier for safety purposes and consider replacing some spares if needed. That way, you’ll have peace of mind knowing your microwave oven will stay in top condition!
7. Replacing The Light Bulb
When it comes to maintaining your microwave oven, replacing the light bulb is an important step. I always recommend buying bulbs that are specifically designed for microwaves and not just any ordinary household bulb. Installing these bulbs correctly can be a little tricky so make sure you have some patience when doing this job!
To ensure that your new bulb will last as long as possible, here’s a few things to keep in mind:
- Make sure you’re wearing protective eyewear when handling the old or new bulb
- Clean all dust from around the base of the bulb before installing the new one
- Use only a soft cloth when wiping down or touching the lens cover
- Carefully read through the instructions on how to properly install the new bulb
Following these steps will extend the life of your microwave oven’s lightbulb and help prevent potential accidents.
That said, never hesitate to call in a professional if you’re ever unsure what to do.
8. Replacing The Roller Ring
First, let’s start by identifying the roller ring. It’s the circular piece inside the microwave that helps the food rotate around evenly so it cooks properly. Once you’ve located the roller ring, the next step is to find a replacement. You can find one online, at a local appliance store, or even at a department store. Once you have the new roller ring, it’s time to install it. Installing it is easy, just follow the instructions that come with the new ring.
Identifying The Roller Ring
Replacing the roller ring is a critical step in maintaining your microwave oven, and one of the first steps you should take when identifying symptoms like uneven cooking or loud noises. When it comes to replacing the roller ring, one important part of the process is identifying which ring you need – something I’m here to help with! Start by checking your model number for compatibility; that’ll ensure you get the right parts for your appliance.
Then there are some visual cues: look for any signs of wear-and-tear or damage on the existing ring and compare them to those pictured on compatible replacement rings online. With these tips, you can quickly identify whether it’s time to replace your roller ring!
Locating A Replacement
Once you’ve identified the right replacement parts for your microwave oven, it’s time to locate them. It’s usually best to order online – that way you have access to a wide range of options and can easily compare prices from multiple vendors. Shopping online also gives you the opportunity to dig into customer reviews, so you know what kind of quality you’re getting before making a purchase.
No matter where you buy your new roller ring, make sure they offer some sort of return policy just in case! All set? Time to install your new part and get back up-and-running with a fully functioning appliance!
Installing The New Ring
Now that we’ve found the perfect new roller ring and ordered it, let’s get it installed! First, you’ll need to attach any fixtures that came with your part. This is usually done by simply sliding them in place and tightening screws to secure them. Make sure you’re using the right type of screwdriver when installing these screws – if they’re too tight or loose, your microwave won’t work properly.
Once everything is attached, double check all connections before powering up your appliance. With a few simple steps, you should be able to complete this installation quickly and easily!
9. Replacing The Door Handle
Have you ever found yourself wondering how to replace a microwave door handle? Well, look no further! Replacing the door handle on your oven is relatively simple and can be done in just a few easy steps. First, start by uninstalling the old handle. You’ll need to unscrew it from its mounting bracket with a screwdriver before being able to remove it completely.
Once removed, get ready for installation of the new handle. Make sure that all pieces are present such as securing screws and other parts needed for proper installation. Use the screws provided with the new handle to securely attach it into place – taking care not to over tighten them. And there you have it! In no time at all, you should now have an operational microwave once again thanks to replacing its door handle correctly.
10. Troubleshooting Common Issues
Now that you’ve replaced the door handle, it’s time to troubleshoot some of the most common issues associated with microwave ovens. First and foremost, make sure all settings are properly adjusted – this includes not only power levels but also timing and defrosting options. Check the manual for details on how to adjust these correctly if need be. Next, check any parts or accessories installed in your unit such as a turntable or shelf rack. Make sure they are firmly attached and working properly before proceeding further.
Lastly, inspect the interior walls of your microwave for signs of damage or debris buildup which can cause problems with heating food evenly. If necessary, use a damp cloth to clean away any residue that could interfere with performance. All these simple steps should help you keep your microwave running smoothly so you can enjoy delicious meals every day!
FAQs
As a maintenance expert, I’m often asked how often one should clean their microwave oven. Cleaning your appliance on a regular basis is essential to maintain its performance and longevity. For optimal results, you must take into account the frequency of use as well as the materials used inside it. The key here is to keep an eye on any buildup and tackle it quickly with safe materials that won’t damage your machine or leave behind residue. Doing this will ensure that not only does your microwave look like new but also operates at peak efficiency for years to come!
You should always keep the inside of your microwave clean and free of debris to ensure it is working efficiently. When it comes to deep cleaning, using a vacuum specifically designed for vents helps clear away any built-up dust or dirt that may be blocking air flow. Wipes are also great for quick cleaning if you don’t have access to a specialized vacuum cleaner. I recommend doing both on a regular basis so that your microwave runs as well as possible for years to come.
When it comes to changing the light bulb in your microwave oven, safety is of utmost importance. Never use a screwdriver as this can damage the connections and possibly cause an electric shock or fire hazard. Instead, always check for any loose wires or faulty connections before replacing the bulbs with proper tools such as pliers. Follow all safety precautions when handling electrical components and make sure you are taking the necessary steps to keep your microwave oven running safely.
Replacing a microwave oven door handle doesn’t require any special tools, but you do need to be sure that the replacement fits properly. I’d recommend measuring the fit of the new handle before installing it with screws. As an expert in maintaining microwave ovens, I can assure you that this is all the preparation required for replacing your microwave’s door handle – no expensive or hard-to-find tools necessary!
Conclusion
In conclusion, keeping your microwave oven well-maintained is crucial for its longevity and optimal performance. By following the tips and guidelines provided in this article, you can ensure that your microwave stays in top condition for years to come. Remember, a little care and maintenance go a long way in preserving the functionality of your kitchen appliance. Here’s to many more perfectly heated meals!