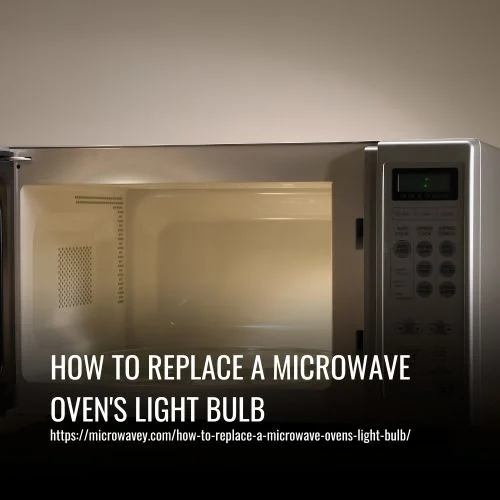
How To Test A Microwave Oven’s Magnetron
To test a microwave oven’s magnetron, you will need a multimeter. First, disconnect the power supply and discharge the high voltage capacitor to ensure safety. Then, set your multimeter to the ohm setting and test the resistance of the magnetron’s terminals.
A working magnetron typically has a resistance of around 0.5 to 1.5 ohms. If the resistance is significantly higher or lower, the magnetron may be faulty and need to be replaced.
To Test A Microwave Oven’s Magnetron, follow these steps:
- Measuring The Magnetron’s Voltage.
- Testing The Magnetron With An Ohmmeter.
- Inspecting For Visible Damage.
- Replacing The Magnetron.
- Testing The Microwave Oven’s Output.
- Troubleshooting Common Problems.
1. Measuring The Magnetron’s Voltage:
Alright, let’s talk about measuring a microwave oven’s magnetron voltage. First off, we need to figure out how to measure the voltage, then move on to testing the magnetron. I’m here to help you every step of the way.
Measuring Voltage
As a microwave oven technician, I’m often tasked with measuring the voltage of a magnetron. The easiest way to do this is by using an oscilloscope to measure the waveguide conductivity and its effect on the microwave radiation output. This helps us determine if there are any fault lines in the antenna or other parts of the system that may be compromising performance.
It’s important to get accurate readings so we can make sure our customers’ microwaves are not only safe but also functioning exactly as they should be. With careful analysis and precise measurements, I’m able to guarantee my clients peace of mind when it comes to their appliance.
Testing Magnetron
Once I’ve finished measuring the magnetron’s voltage, it’s time to move on to testing.
To do this, I need to understand its operating principles and power requirements; that way, I can accurately assess whether or not the microwave is working as it should be.
This involves running a series of tests to make sure everything is up-to-date and functioning correctly.
With these checks in place, I’m able to ensure my customers’ microwaves are both safe and efficient for years to come!
2. Testing The Magnetron With An Ohmmeter:
Testing the magnetron of a microwave oven is an important step in ensuring its functionality. To do this, I use an ohmmeter to measure the resistance of the component.
First, I disconnect the power supply and take off the cover panel so that I can access the magnetron terminals. Then, using my ohmmeter, I measure both terminals separately while noting down the readings; these should be similar as they indicate that there isn’t any short or open circuit.
If one terminal shows lower reading than other then it indicates a problem with magnetron’s connections or wiring problems. Finally, once all tests are complete, if everything checks out OK then I am confident that the magnetron is working properly and ready for installation back into the oven.
All wiring must be connected correctly before powering up again otherwise it might result in damage to components and potential fire hazard!
3. Inspecting For Visible Damage:
I’ll start by inspecting the exterior of the microwave oven for any visible damage. I’ll check for cracks, dents, or any other irregularities that could indicate an issue.
Inspect Exterior
As a microwave oven technician, I always inspect the magnetron for any visible damage. This includes checking the exterior of the part for signs of wear and tear, such as cracks or debris buildup.
Cleaning tips can help ensure that this inspection is thorough; mounting techniques should also be taken into account to ensure that there are no loose connections in the connection points between the device and its housing.
It’s important to pay attention to these areas when inspecting a magnetron – if they’re not up to scratch, it could mean faulty wiring and potential fire hazards!
Check For Cracks
Once I’ve assessed the wear and tear on the exterior of a magnetron, it’s time to check for cracks. This is an important step – even minor fractures can be indicators of larger problems that could cause serious faults in circuitry or connections.
It’s my job as a technician to identify any signs of cracking before they become bigger issues, so I take great care when examining each part for potential breaks.
Additionally, I’m always on the lookout for any other faults that might not be visible at first glance.
4. Replacing The Magnetron:
When it comes to testing a microwave oven’s magnetron, a technician must first understand the specs and power ratings of the device. From there, they can determine if the part needs replacing or repair.
Replacing a magnetron requires precision and care:
- Unplug the microwave from its power source. This will ensure that no electric shock is administered during any step of the process.
- Remove all screws located around the outer edges of the product. This will allow access to internal components like the magnetron without causing damage to other parts.
- Carefully lift off the top panel with caution to avoid damaging wires and connectors connected to nearby parts in order for full access to be gained inside the unit.
Once removed, check each specification listed on the new magnetron against those found on old one before making an installation decision – this will guarantee compatibility between both parts so as not to cause further issues down-the-line due to improper functioning caused by incompatible pieces being used together in unison.
5. Testing The Microwave Oven’s Output:
Once I have determined that the microwave oven’s magnetron is in good working order, it’s time to test its output.
The first step of this testing procedure is to set a timer for two minutes and place a cup of water in the center of the cooking chamber.
When the allotted cooking times has passed, I remove the cup from the oven and measure its temperature with an infrared thermometer. If the result reveals that at least 90°C was reached, then the microwaves are operating as expected and there isn’t any need for further troubleshooting.
Next up, I check how evenly heat is distributed throughout the interior cavity by placing four pieces of toast on each shelf level inside the microwave.
Once again, after two minutes of operation, I take out all slices and measure their surface temperatures with my thermometer. If they all reach 80-85 degrees Celsius or higher, then we can be confident that heat is being produced uniformly across every inch of space within our device – another sign that everything is running smoothly!
6. Troubleshooting Common Problems:
Now that you have tested the microwave oven’s output, let’s move on to troubleshooting common problems.
As a technician, I need to practice preventative maintenance in order to keep your oven running safely and efficiently. This would include checking all of the internal components such as the magnetron, diode, high voltage capacitor and door switch.
I recommend testing each component separately with an ohmmeter or multi-meter to identify any potential issues before they become major safety hazards.
Additionally, I always advise clients on how to properly use their microwaves. Knowing which settings are best suited for certain types of food can help in avoiding unnecessary repairs down the line.
So remember: stay informed about proper usage and perform regular preventative maintenance checks so you don’t run into any unexpected surprises!
Sourcing A Replacement Magnetron
It’s estimated that nearly 14 million microwave ovens are sold in the U.S. every year, and have become a common appliance in kitchens worldwide. As a technician, it is important to know how to test a microwave oven magnetron for optimal performance and safety–especially when sourcing a replacement.
When shopping for a new magnetron, be sure to keep installation advice in mind as different types of magnetrons require special tools or preparation steps prior to use.
Additionally, look out for tips such as reading reviews from other customers who purchased the same product – they can provide valuable insight into the quality of your purchase!
Before installing the unit, make sure all safety features are enabled and double check that power cables are properly connected.
Taking these extra precautions will ensure you’re getting optimal performance from your newly installed part.
Safety Precautions
Before we dive into the testing process, it’s important to understand safety precautions. Proper grounding is key when dealing with microwaves and magnetrons – without proper grounding, there could be serious electrical shocks or even electrocution! I always make sure my tools have been tested for proper grounding before I start working on a microwave oven.
It’s also important to wear appropriate clothing while working on a microwave oven; loose-fitting clothes that cover your arms and legs can prevent nasty burns if you accidentally come in contact with any exposed parts of the appliance.
Another thing to consider is magnetron shielding: this helps protect users from exposure to radio frequency radiation emitted by the magnetron. If you’re not sure whether or not the shield has been installed correctly, use an RF meter to check its efficiency. A defective shield could put people at risk of being exposed to harmful levels of radiation during normal operation of the oven.
To ensure everyone’s safety, double-check all wiring connections between components like capacitors and transformers for signs of damage or corrosion before continuing with the test procedure. Also keep in mind that some magnets used in microwaves may contain hazardous materials such as lead, so take caution when handling them accordingly.
FAQs
Replacement magnetrons can vary in price depending on the model of microwave and where you buy it from. Generally, they cost between $20-$50 plus shipping costs. If you plan to install the new magnetron yourself, make sure you follow instructions carefully as improper installation could be hazardous. Also bear in mind that if you’re not experienced with this kind of work, there may be additional costs involved for professional installation tips.
As a microwave technician, it’s important to understand how often the magnetron in your ovens should be tested. Generally speaking, we recommend testing the magnetron at least once per year for safety reasons. This ensures that all components are running correctly and efficiently, as well as following any applicable microwave safety guidelines.
Regularly testing your magnetrons also helps maintain them and ensure they’re up-to-date with their maintenance requirements. Doing so will help you keep costs down by avoiding costly replacement parts or repairs due to malfunctions or breakdowns of older equipment.
Yes, it is possible to test a microwave oven’s magnetron without specialized equipment. However, the testing procedure should be done in accordance with safety guidelines and best practices.
As a microwave oven technician, I recommend using an ohmmeter to measure resistance across the terminals of the magnetron. If the reading falls within manufacturer’s specifications, then you know your magnetron is working properly. Otherwise, you may need to replace it for optimal performance.
When it comes to testing a microwave oven’s magnetron without the necessary safety precautions, there is no doubt that it’s an undertaking that should be approached with extreme caution! After all, improper handling of radiation can have serious consequences.
As a technician well-versed in radiation safety and test equipment, I’d strongly advise against attempting such a task unless you’re properly equipped and trained – otherwise, you could put yourself at great risk.
It’s definitely possible to repair a damaged magnetron instead of replacing it, but you need to be mindful of radiation safety. As a microwave oven technician, I’d suggest researching alternative solutions since repairing can potentially put you at risk if not done properly. Make sure that whatever solution you decide on is compliant with the recommended standards for radiation safety before attempting any repairs.
Conclusion
As a microwave oven technician, I understand the importance of ensuring that your appliance is working properly.
Testing a microwave oven’s magnetron doesn’t have to be expensive or difficult – with the right knowledge and safety precautions, you can make sure your oven is functioning optimally without breaking the bank.
While replacing a damaged magnetron may seem like an easy solution, it might not actually be necessary. In some cases, repairs are possible if the damage isn’t too severe. This could save you money in the long run, so it’s definitely worth looking into before purchasing a new part.
No matter what route you choose, testing your microwave’s magnetron should always be done with caution. Making sure everything is up to code ensures that your appliance will last for years to come and provide delicious meals for you and your family!