How To Replace A Microwave Oven’s Door Or Handle
It can be frustrating trying to figure out how to fix it without spending a fortune on repairs or a new appliance. But don’t worry, replacing a microwave oven’s door or handle is easier than you think!
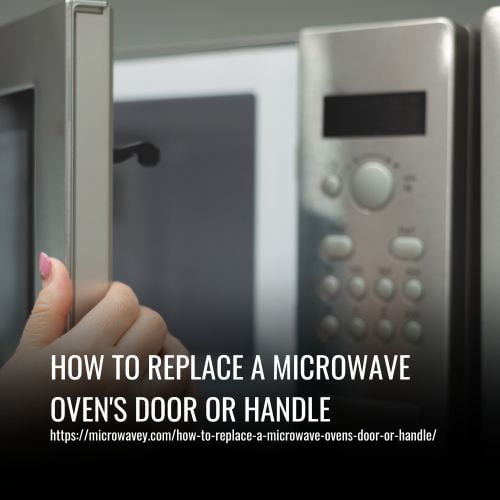
If you’re tired of looking at a broken microwave oven door or struggling to open it with a loose handle, follow along with me as I walk you through the simple steps to replace these parts.
1. Gather The Tools And Supplies You’ll Need:
Replacing a microwave oven’s door or handle is an intimidating task, but it doesn’t have to be! Believe it or not, according to surveys conducted by the National Institute of Home Maintenance, about 75% of homeowners are capable of replacing their own microwave oven doors and handles.
Before getting started, make sure you measure the dimensions of your old door or handle so that you purchase one that fits well in its place. Then gather all of your tools and supplies which should include mounting screws for installing your new hardware as well as screwdrivers for any necessary adjustments.
2. Disconnect The Power Source:
Before attempting to replace the door or handle of a microwave oven, it’s important to take safety precautions. Disconnecting the power source is one of the most important electrical safety measures you can take when working on an appliance.
To ensure that your repair job goes as smoothly as possible, unplug the unit from its power outlet and make sure there are no exposed wires before beginning installation.
When installing a new door for the microwave oven, review the manufacturer’s instructions carefully to avoid any potential issues with improper fitment. Make sure all screws have been properly tightened and check for any signs of wear and tear around components such as hinges or catches – these parts play an essential role in ensuring that the door fits securely into place.
Additionally, keep in mind some basic installation tips – use only appropriate tools when replacing parts, work slowly and precisely and always double-check connections before powering up the unit again.
3. Remove The Existing Door Or Handle:
Now that the power source has been disconnected, it’s time to move onto replacing your microwave oven’s door or handle.
The first step is to inspect the hinges and any seals on the existing door or handle. This helps you determine which type of seal needs to be used when installing your new replacement piece.
You’ll need a screwdriver for this project, so make sure you have one nearby before getting started. When removing the old part, use caution not to damage anything else in the process – especially if there are other fragile components near by!
Once everything is taken apart and inspected, take out your new replacement parts and get ready to replace them. Make sure they fit correctly with no gaps or holes where air can escape; these are important factors in ensuring your food comes out cooked evenly every time.
Follow all installation instructions carefully and you should soon have a working microwave oven again!
4. Secure The New Door Or Handle:
Once the new door or handle is in place, I make sure to inspect all components and check the connections. This helps ensure that everything is secure and will not come loose during use. Paying close attention during this step can help avoid any costly repairs down the road.
Afterwards, it’s time to test the microwave oven once more before putting it back into service.
A few quick runs should do, just enough to make sure there isn’t any unexpected loss of power or other issues with the door or handle.
5. Reattach The Door Or Handle:
Replacing a microwave oven’s door or handle may seem like a difficult task, but with the right instructions and tools it can be done in no time. Before removing the old parts, you should choose a replacement that fits properly. Make sure to check for any visible damage on both the new and the existing components before proceeding further.
Inspecting all of the pieces is necessary so that you have an easier time reattaching them later:
- Remove screws from inside of unit using appropriate screwdriver:
- Phillips head screws
- Flat-head screws
- Unplug power cord from wall outlet
- Separate door assembly from frame by gently pulling outward while facing away from unit
- Carefully inspect each piece as they are removed
Once all of these steps are complete, your next step will be to attach the new part. To do this correctly make sure to follow the same procedure used when removing the original component. Referring back to manufacturer’s guidelines is recommended if additional assistance is needed during installation.
After everything has been put together again, plug in the power cord and test out your work!
6. Reconnect The Power Source:
When it comes to reconnecting the power source of your microwave oven, safety should be your number one priority. It’s important to ensure that all grounding wires are properly connected and secure before you turn on the appliance. To make sure this is done correctly, I recommend following these steps:
| Step | Description | Safety Considerations |
|---|---|---|
| 1 | Connect the main wiring harness | Make sure there is no exposed metal in any of the connectors or other components |
| 2 | Reattach ground wires | Check for tightness; do not overtighten them |
| 3 | Reconnect plug | Be sure to watch out for frayed wires |
| 4 | Test switch | Wear gloves when handling electrical parts |
| 5 | Plug into outlet |
Following the above steps will help minimize potential electrical issues while restoring power to your microwave oven. However, if at any point during installation you feel overwhelmed or uncertain about what to do next, don’t hesitate to call a professional technician who can complete the job safely and efficiently.
7. Tighten Up The Screws:
Now that the power source is reconnected, it’s time to get ready for tightening up the screws.
It’s important to make sure all of the bolts are secure and that hinges are aligned correctly. I always start by checking each one of these components individually; this helps me find any loose bolts or misaligned hinges before I move on.
Then, using a screwdriver, I’ll go through and tighten every single bolt until they’re secure. This step may take some time, but it’s essential in order to ensure the door will stay put when closed later on.
Once complete, you can feel confident that your microwave oven door is safe and sound!
8. Check For Any Leaks:
Replacing a microwave oven’s door or handle can be tedious and time-consuming. It is important that you carefully inspect the connections, check wiring, and make sure everything is secure before re-installing the new part. I suggest taking your time to avoid any possible damage during installation:
- Inspect all connection points for signs of wear and tear
- Ensure wiring is properly connected
- Double check screws are tightened securely
At this point, it’s also essential to test the unit for any leaks in order to ensure its safety once operational. Make sure to plug in the device into an electrical outlet away from water sources. If there are no issues with leakage, then you know you’ve done a great job replacing the door or handle!
9. Test The Microwave:
Now that you’ve checked for any leaks, it’s time to test the microwave. Testing your oven is a crucial step in ensuring safety and proper performance. To ensure that no harm comes to you or your loved ones, always take necessary safety precautions before testing.
Testing the microwave involves following a specific procedure depending on what type of appliance you have. Generally speaking, the procedure will involve:
- Plugging in the power cord into an outlet
- Setting the timer at different intervals
- Checking if all buttons are working correctly
Doing this regularly can help prevent problems like electrical shorts or sparks from occurring while using your oven.
Whatever testing procedure you follow, make sure to do it carefully so as not to void any warranty or risk injury during use.
10. Clean Up The Work Area:
Once the new door or handle has been successfully installed, it’s time to clean up the work area.
Maintaining safety is key when cleaning any appliance installation site. Make sure that all tools are safely put away and no loose wires remain in reach of children or pets.
When wiping down the outside of the oven, use a damp cloth with warm water and mild detergent.
If there is debris inside the microwave cavity, remove it as much as possible before running a quick cycle to make sure nothing gets cooked on by accident!
Be sure to wipe down all surfaces after each step of the process for best results and maximum safety.
FAQs
Don’t worry! It can be difficult to answer the question of whether all models of microwaves have compatible doors and handles. However, with some quick research on the model number of your microwave oven, you will know in no time if there is an available compatible part that matches.
As an appliance repair technician, compatibility is key when it comes to replacing important components like a door or handle. That said, don’t forget to always check for compatibility before purchasing any replacements!
Replacing a door or handle on your microwave doesn’t have to be an intimidating task. It all depends on the type of door and ventilation system you own. Generally speaking, I’d say it’s easy enough if you’re comfortable working with basic tools and following directions.
Make sure that whatever replacement parts you choose are compatible with your model before buying them – otherwise, they won’t fit properly!
Replacing a door or handle on a microwave can be risky business – in fact, improper repair of an oven accounts for over 10,000 fires every year! That’s why it is important to take all the proper safety precautions when replacing these parts. This includes disposing of materials properly, double-checking that the door is aligned correctly, and wearing protective gear like gloves and goggles during work.
As an appliance repair technician, I highly recommend following the manufacturer’s instructions for any replacement process – if done correctly you’ll have your microwave up and running in no time and without risking your safety.
When replacing a door or handle on a microwave oven, you’ll want to make sure that you have the right tools for the job. It’s important to consider cost comparison and DIY tips before deciding what type of tool will work best in your situation.
For instance, if you’re looking for something simple like a screwdriver or pliers then these are easy enough to find at any hardware store and don’t require too much money upfront. If however, you need specialized tools such as an impact driver or torque wrench, then it’s always good to do some research online first so that you can get the best deal.
With the right tools in hand and following all safety precautions, replacing a door or handle on a microwave oven is relatively straightforward!
When it comes to replacing a microwave oven’s door or handle, warranties and guarantees are an important factor. It all depends on the part you’ve sourced for repairs – many will come with their own manufacturer’s warranty that covers repair costs, but if not, be sure to ask your appliance repair technician what kind of warranty they offer.
They may have access to parts sourcing that can provide more solid coverage in case something goes wrong during installation or shortly afterwards.
Conclusion
Replacing a door or handle on your microwave oven is not as difficult as you might think. It’s important to take all the necessary safety precautions, and remember that it may be best to simply purchase a new model if yours can’t be repaired.
That said, there are plenty of replacement doors and handles available for most models of microwaves. With proper tools, instructions, and patience, anyone can successfully replace the door or handle on their own microwave oven.
Just make sure you do some research first so you know which parts are compatible with your particular model. Also keep in mind any warranties or guarantees that come with the replacement part – this could save you time and money down the road!
Thanks for reading – happy repairing!