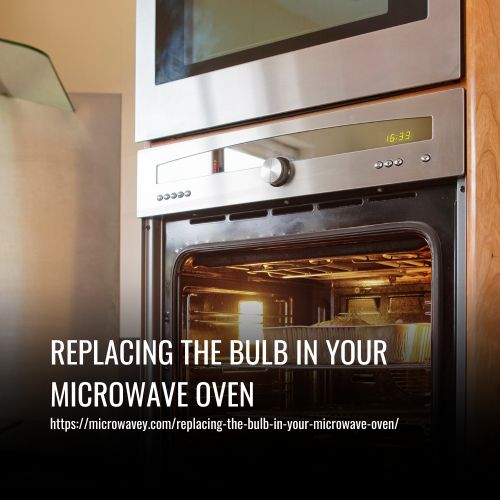
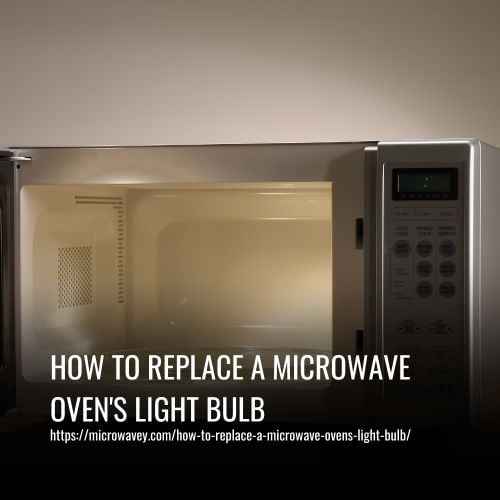
How To Replace A Microwave Oven’s Light Bulb
Replacing the light bulb in a microwave oven is an easy job that anyone can do with just a few simple tools and some patience.
To Replace A Microwave Oven’s Light Bulb, follow these steps:
- Gather The Necessary Tools.
- Unplug The Microwave.
- Remove The Cover.
- Locate The Old Bulb.
- Remove The Old Bulb.
- Clean The Socket.
- Install The New Bulb.
- Replace The Cover.
- Test The Light.
- Plug In The Microwave.
1. Gather The Necessary Tools:
I’m here to show you how to replace the light bulb in your microwave oven.
Before we get started, it’s important to identify and gather all of the tools that you’ll need for the job. You should assess safety first by unplugging your appliance before proceeding with any repair work.
This means making sure that the power is completely off while you’re working on replacing the light bulb inside of your microwave oven.
You will likely need a Phillips-head screwdriver and possibly some needle nose pliers, depending on what type of screw or fastener holds your light fixture into place.
Once you have these tools ready to go, then you can move onto removing the old bulb and installing the new one.
2. Unplug The Microwave:
Before starting any appliance repair, safety precautions should always be taken. It’s like a doctor looking both ways before crossing the street – you have to check your surroundings and make sure it is free of harm for yourself and others around you.
That being said, unplugging the microwave oven from its power source should be done first. Once this has been done, you can proceed with replacing the light bulb.
When replacing a light bulb in an oven, ventilation issues must also be taken into account as heat generated from the new bulb could cause some damage to internal components if not released properly. Make sure there are no obstructions blocking air circulation and that all ventilation slots are clear for proper flow of hot air out of the unit.
This will help reduce potential problems down the line when using the oven on a regular basis.
3. Remove The Cover:
When replacing a microwave oven’s light bulb, the first step is to remove the cover.
To do this safely, unplug the appliance before attempting to open it up. Then, use either a flathead screwdriver or an Allen wrench to carefully unscrew and lift off the top panel of your microwave.
Once you’ve opened it, inspect all wires and components inside for any possible damage that may have been caused by heat buildup over time. If everything looks okay then proceed with removing the worn-out light bulb from its housing.
Make sure not to touch it with your bare hands as oils can reduce its lifespan significantly. Finally, install the new replacement light bulb in its place and secure it with screws if needed.
4. Locate The Old Bulb:
First things first, I’m going to locate the old bulb.
To do this, I need to identify which parts are involved and check any connections between them.
First, I’ll look at the back of the microwave oven for a removable panel that may be covering the light bulb socket.
Then, I will assess how many screws are used in holding it on and remove those screws with an appropriate size screwdriver.
Once it’s removed from its mountings, I can take out the old bulb and inspect it.
If there is no obvious sign of damage or wear, then chances are all the wiring is still connected correctly.
But if something looks off then I’ll want to double-check all the electrical components before replacing it with a new one – just in case!
5. Remove The Old Bulb:
Ah, the joys of replacing a microwave oven’s light bulb. Nothing says ‘I’m an amateur appliance repair technician’ like attempting to install something as small and insignificant as a light bulb!
But, never fear – with this easy-to-follow guide, you can have that old bulb out in no time flat.
First off, before you start unscrewing things, make sure the wattage on your new bulb is correct for your microwave model. You don’t want any unpleasant surprises after all that work!
Then it’s time to get started installing guards around the area so nothing gets broken when removing the old one. After that, just pop open your microwave door and take out the old bulb using some pliers or a screwdriver (depending on what type of socket you have).
With the old bulb safely removed from its socket, you’re ready to replace it with your brand new one. Just be careful not to touch either side of the glass part directly with your bare hands – we wouldn’t want any oil residues messing up our hard work now would we?
All that’s left is to reassemble everything and voila – bright new lights coming from inside your trusty kitchen appliance!
6. Clean The Socket:
Now that you’ve removed the old light bulb, it’s time to get ready for a new one.
Start by making sure the socket is clean and free from any dirt or debris. I recommend using some cleaning supplies such as alcohol wipes or a damp cloth to do this.
Make sure there are no pieces of glass left in the socket either; it could cause sparks when you insert the new bulb which can be dangerous.
When selecting your replacement bulb, make sure you get one with the same wattage as what was originally installed in the oven. This will ensure that you don’t end up damaging other components within the appliance due to too much heat being generated.
It’s also important to double-check that the base type of the new bulb matches so it fits correctly into the socket.
Once everything looks good and all safety precautions have been taken care of, go ahead and install your brand new lightbulb!
7. Install The New Bulb:
Before installing the new bulb, I first have to assess the wattage of the existing one. All microwave ovens come with a specific set of requirements that need to be taken into consideration when replacing a lightbulb. It’s important to check this before purchasing and installing any replacement bulbs as if you get it wrong it could cause damage to your appliance.
Once I’ve identified the model of your microwave oven, I can determine what size and wattage bulb is necessary for installation.
Once I have all these details, then I’m ready to start swapping out the old lightbulb for a new one. Before handling any electrical components in an appliance, it’s always best practice to unplug it from the power source just in case something goes awry during installation.
With my tools at hand, including gloves and safety glasses, I will carefully unscrew the old bulb and replace it with the correct one – making sure not to touch its surface directly or otherwise potentially harm myself or others in the process.
8. Replace The Cover:
Now that the old bulb has been replaced with a new one, it’s time to replace the cover. Before you start this process, make sure to check fit and determine size of the cover so it can be placed back correctly.
Here are some steps for properly replacing your microwave oven’s light bulb cover:
- Make sure all connections are secure. This includes testing any wiring or other components around the area where the new bulb was installed.
- Carefully reassemble the parts in reverse order of how they were taken apart. Pay special attention to ensure everything is lined up correctly before moving onto the next step.
- Always use caution when handling sharp edges as these can cause injury if not handled properly. It may be helpful to wear gloves when doing this part of the job.
- Securely attach all screws and nuts used during reassembly; double-check each screw or nut to make sure they are fastened tightly into place.
- Replace any covers or panels that protect internal components from dust and debris.
Now your microwave oven is ready for use again!
9. Test The Light:
Before we get started, let’s make sure the light bulb you’re using is compatible with your microwave. I’ll need to know the model and make of your microwave. Once we’ve confirmed the compatibility, let’s unplug the microwave from the wall. After that, we’ll remove the light cover to get access to the light bulb.
Test Light Compatibility
When it comes to replacing a microwave oven’s light bulb, you’ll need to check the wattage and compare models.
Start by unplugging the appliance from the wall outlet and removing the cover plate or glass panel that protects the light bulb.
Once your new light bulb is in hand, look at its information label for details about wattage and other components.
Then, compare this with what’s already installed in your microwave oven – if there are any differences between them then don’t proceed!
Instead, purchase an identical model so you can replace without worry.
The last thing you want is a mishap resulting from incompatibility issues!
Unplug The Microwave
Now that you’ve got your new light bulb and compared it to the old one, it’s time to unplug the microwave.
Before doing any kind of maintenance on an appliance, it’s important to remember safety first – so don’t forget to unplug!
This is a simple task but can be easily overlooked in the excitement of installing something new.
As part of preventative maintenance, make sure you always take this step before getting started with any kind of repair or installation job.
That way, you’ll ensure everything runs smoothly and avoid unnecessary risks.
So don’t skip this key step when replacing your microwave oven’s light bulb!
Remove The Light Cover
Now it’s time to remove the light cover and make sure we can adjust the brightness of the new bulb.
Don’t worry, this step is still relatively simple – but there are a few safety precautions you need to take before doing so.
Make sure you unplug the microwave again before trying to access the interior components!
I always recommend turning off any power source when working on an appliance; that way, you won’t run into any unexpected surprises while making adjustments.
So let’s get started with removing the old light cover and getting our new bulb ready for use!
10. Plug In The Microwave:
Plugging in the microwave is a crucial step, but it’s also one that requires extreme caution. Before doing anything, make sure you take all necessary safety precautions.
Put on protective gloves and glasses, turn off any power source connected to the oven and unplug the appliance from its outlet. Then you’ll be ready to start your work!
Now comes the tricky part: locating the light bulb for replacement. In most cases, this should be easy enough to find – it will usually be located behind a small panel or grille at the top of the microwave interior.
Once you’ve found it, carefully detach any wires connecting it to other components and use an appropriate sized screwdriver to loosen the screws holding it in place. Finally, remove the old light bulb and replace with a new one before reattaching everything in reverse order.
FAQs
When it comes to replacing a microwave oven’s light bulb, the first thing you need to do is figure out what type of bulb you need. You can usually find this information in your appliance manual or online.
Once you know the size and wattage of the bulb that’s needed, finding one isn’t too difficult. I’d recommend looking for bulbs specifically made for microwaves since they tend to be better quality than generic ones.
When replacing a microwave oven’s light bulb, it’s important to follow safe practices and ensure electrical safety. It can be risky if not done properly.
I always recommend that folks unplug the appliance before attempting any kind of repair or maintenance task like this. There is potential for an electric shock when working with live wires, so make sure you take all necessary precautions before starting.
When it comes to buying a replacement bulb for your microwave oven, the average cost is around $10. While this isn’t an outrageous amount, you may be able to find cheaper bulbs if you shop around; I’ve seen them as low as $5!
Before making any purchases though, make sure that you know what size and wattage of bulb you need so that you don’t end up with something incompatible. You’ll also want to ensure that whatever bulb you buy is rated for use in a microwave oven so there are no problems once it’s installed.
When it comes to working safely with a microwave oven’s light bulb, you definitely want to avoid handling the bulb directly with your bare hands. Doing so can easily cause burns and other issues due to the heat the bulb can produce.
To be on the safe side, make sure you always wear gloves when replacing or touching the bulb. Additionally, if you find yourself needing to purchase a replacement bulb for your microwave oven, typically they cost around $10-$15 dollars depending on where you shop.
It’s important to replace the light bulb in a microwave oven regularly. Usually, this should be done when you notice it burning out or if rising temperatures are detected inside the oven.
In most cases, every 6-12 months is a good rule of thumb for replacing the bulb – more frequently if you’re noticing frequent burning or too much heat buildup when using your oven.
Conclusion
Replacing a microwave oven’s light bulb may seem like a daunting task, but it doesn’t have to be. With the right supplies and knowledge, you can easily change out the old bulb for your new one in no time.
I recommend making sure to purchase the correct type of replacement bulb before starting so that you don’t run into any issues later on down the road. Additionally, make sure you take all necessary precautions when replacing the lightbulb such as using gloves or unplugging the appliance from its power source – this will help ensure that there is no risk of electric shock.
Lastly, remember that light bulbs should typically be changed every six months or whenever they become noticeably dimmer than usual.
By following these tips, you’ll soon find yourself with a brightly lit kitchen! As an experienced repair technician I promise that if you approach this job with care and attention to detail it won’t be long before your kitchen is back up and running again.
So go ahead, grab those tools and get started – happy fixing!