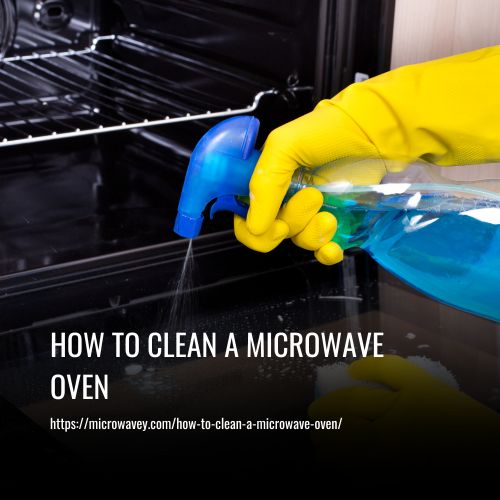
How To Clean A Microwave Oven
Microwave ovens are a staple in most kitchens, making meal prep quick and convenient. However, as with any appliance, they require regular cleaning to ensure they continue to work efficiently and safely. If you’ve ever experienced a messy explosion inside your microwave, you know how important it is to keep it clean.
To clean a microwave oven, follow these steps:
- Gather The Cleaning Supplies
- Unplug The Microwave
- Remove The Turntable And Tray
- Lift The Turntable
- Soak The Tray In Hot Water
- Wipe Down The Interior
- Use Baking Soda And Vinegar To Remove Stains
- Clean The Door And Control Panel
- Clean The Exterior Of The Microwave
- Clean The Ventilation Slots
- Replace The Turntable And Tray
How To Clean A Microwave Oven
1. Gather The Cleaning Supplies
It’s time to get our hands dirty and clean the microwave oven! Before you start, gather your supplies. You’ll need a sponge or cloth for scrubbing, a bowl filled with hot water and some liquid dish soap, plus sanitizing tools like vinegar and baking soda.
To make things easier, you can even use steam cleaning solutions specifically designed for microwaves. Now that we have all of our supplies ready to go, let’s move on to the next step – removing food particles from inside the microwave.
2. Unplug The Microwave
Now that you have gathered all the cleaning supplies, it’s time to unplug your microwave oven. Depending on how often you use and clean your appliance, this step should be done regularly. Unplugging prevents any potential electrical issues or shocks while scrubbing away at stuck-on food particles or grime.
Once unplugged, here are four disinfecting tips to keep in mind as you begin steam cleaning:
- Wipe down the interior walls of the oven with a damp cloth and warm soapy water.
- Remove the turntable from inside the oven and wash separately in hot soapy water.
- Use a soft sponge for tough stains instead of abrasive materials like steel wool pads which can scratch surfaces.
- After washing each part of the oven, wipe off excess moisture with a dry paper towel before returning them back into place.
Remember to wear protective gloves when handling harsh chemicals such as bleach or ammonia during your cleaning process for added safety!
3. Remove The Turntable And Tray
To get started, let’s begin with unplugging the microwave. Make sure you disconnect the power cord from the outlet before you do any further cleaning. Then, you’ll want to lift the turntable out of the microwave. Be sure to hold it securely so it doesn’t slip during the process.
4. Lift The Turntable
Now that you’ve unplugged your microwave oven and grabbed a damp cloth or sponge, it’s time to lift off the turntable. The best way to do this is by grasping onto both sides of the tray from underneath and gently lifting up with even pressure. Make sure not to twist or jostle the tray too much as you remove it – doing so could cause damage!
If there are any stubborn spots on the turntable, use some deep cleaning techniques such as steam cleaning or scrubbing with an abrasive pad for tough stains. You’ll be surprised at how quickly your microwaves will look like new again!
5. Soak The Tray In Hot Water
Believe it or not, the first step in cleaning a microwave oven is steaming! This simple process can be done with heat wipes and hot water. Simply place the heat wipes around the tray of your microwave and pour warm to hot water over them. Make sure you spread out the wipes evenly so that as much surface area of your tray is covered. The steam created will help loosen any food particles stuck to the walls of your oven.
At this point, all you have to do is let the steam sit for about 10 minutes before wiping down your tray with a damp cloth or sponge. You’ll likely find that most of the grime has been lifted off from the steam alone! For those tough areas, use an old toothbrush dipped in baking soda and scrub away until clean. In no time at all, your microwave will look sparkling new again!
6. Wipe Down The Interior
Cleaning the interior of your microwave oven is a crucial part its upkeep. To start, remove all items from the inside and place them in either a dishwasher or the sink for cleaning. Make sure to use hot water when washing any dishes that you plan on placing back into the microwave.
Once everything has been removed, it’s time to get started! I recommend using steam cleaning as an effective way to sanitize the interior walls of your microwave. Fill up a bowl with two cups of water and add one tablespoon of white vinegar to it. Place this mixture in the center of your empty microwave and heat it up for five minutes on full power.
This will create steam which helps loosen stuck-on food particles while also killing germs and bacteria living on the surface. Once finished, simply wipe down the surfaces with a damp cloth or paper towel. Your microwave should now be clean and ready for use!
7. Use Baking Soda And Vinegar To Remove Stains
When it comes to cleaning a microwave oven, I strongly recommend using baking soda and vinegar. This is an easy way to remove stains without needing harsh chemicals or expensive products.
Here are some tips for success:
- Preheat the inside of the oven by running it on full power for several minutes. The steam created will help loosen up any stuck-on food particles.
- Create a paste with equal parts baking soda and water then apply it to all surfaces with a damp cloth. Let this sit for 15 minutes before wiping clean.
- For tougher spots, use lemon juice mixed in with the same amount of vinegar and leave for 10 minutes before wiping away grime.
- To finish off, take out all removable pieces from the microwave, such as racks or trays, and wash them separately in warm soapy water.
These simple steps can get your microwave looking like new again! With just a few regular maintenance cleans throughout the year you can keep it spotless at all times.
8. Clean The Door And Control Panel
Removing grease is a key step in cleaning your microwave oven’s door and control panel. To do so, grab a damp cloth and wipe the surface of the microwave door and control panel thoroughly.
Remove Grease
When it comes to cleaning the door and control panel of your microwave oven, removing grease is one of the most important steps. I’m an expert when it comes to keeping these areas clean – that means no greasy buildup!
First off, make sure you’re using proper cooking techniques to prevent any excess grease from forming in the first place. You’ll want to avoid over-cooking food or reheating old leftovers, which can both contribute to a greasy mess.
Then use a damp cloth with mild soap and water and gently scrub away at any remaining residue until everything’s squeaky clean! No need for harsh chemicals here; just good ol’ fashioned elbow grease will do the trick!
Wipe With Damp Cloth
Once you’ve got the grease cleaned up, it’s time to move on to wiping down the door and control panel with a damp cloth. You can use plain water or add some dish soap for extra cleaning power.
If there are any tough spots that won’t come off, try steam cleaning them with a handheld steamer – this should blast away any remaining dirt and grime! With just a bit of effort, you’ll have your microwave oven looking like new in no time at all!
9. Clean The Exterior Of The Microwave
Cleaning the exterior of your microwave oven doesn’t have to be a daunting task. With the right cleaning solutions and techniques, you can get it looking as good as new in no time! I recommend starting with warm water and mild dish soap. You don’t want anything too abrasive for this delicate job. Simply dip a soft cloth into the solution, wring it out so it’s not dripping wet, then wipe down all surfaces until they look clean.
For tougher stains or stuck-on food, use baking soda on a damp sponge instead. This is a great non-abrasive way to scrub away dirt without damaging the surface of your appliance. Don’t forget to dry off any excess moisture before calling it quits – that’s how you keep your microwave looking shiny and spotless!
10. Clean The Ventilation Slots
Now that the exterior of your microwave oven is clean, it’s time to move on to the ventilation slots. Keeping these areas free from dust and debris can help ensure effective airflow when you use your appliance. While a dry cloth can be used to dust off any dirt or particles, a more thorough cleaning will require steam cleaning or chemical solutions.
Steam cleaning is an effective way to remove stubborn grime and bacteria without using too many harsh chemicals. All you need is some hot water and vinegar in a bowl placed inside the microwave for three minutes at full power – this should create enough steam to loosen any dirt build up within the vents.
If this doesn’t work however, then you may have to resort to chemical solutions such as detergent mixed with warm water, which will do the trick but needs extra care as not all surfaces are suitable for strong cleaners. Always check product labels before applying them!
11. Replace The Turntable And Tray
When it comes to cleaning a microwave oven, replacing the turntable and tray is an important step that shouldn’t be overlooked. It’s like trying to fit a square peg in a round hole – if you don’t do it correctly then the process won’t work out as intended!
Here are some key points to remember when replacing these parts:
- Check the alignment of your new parts before installing them.
- Make sure they’re clean and free from any debris.
- Examine all connections for wear or damage prior to installation.
- Put everything back together carefully so nothing gets damaged.
Taking extra care with this step will ensure that your microwaves runs efficiently without any problems down the line. So put on those oven mitts and get ready to tackle this job head-on!
FAQs
As an expert in microwave oven cleaning, I always recommend regular preventative measures and steam cleaning to ensure your appliance lasts for years. How often you should clean your microwave depends on how often you use it – generally speaking, a good rule of thumb is to give it a deep clean about once every couple months. If you’re using the microwave frequently, then consider giving it a quick wipe down after each use too. This will keep any messes from accumulating or becoming stuck-on so that when it’s time for a deep clean, the job won’t be as daunting.
Cleaning your microwave oven doesn’t have to be a chore. It’s important to do it regularly, and the best way is with steam cleaning or dish soap. For an effective clean, use either warm water and vinegar for a natural solution or mix a teaspoon of dish soap in a bowl of hot water for tougher stains. If you’re looking for something even more powerful, try using baking soda and lemon juice to get rid of any lingering odours. Whatever method you choose, make sure you wipe down all surfaces with a damp cloth afterwards so your appliance looks good as new!
When it comes to cleaning a microwave oven, safety should always be your top priority. It’s not recommended to use abrasive cleaning products inside the appliance as these can damage its walls and even cause sparks that could result in fire hazards. Instead, opt for chemical-free solutions such as steam cleaning or using vinegar diluted with water. These are safer options that provide great results without causing any harm to your microwave oven. So if you’re looking for an effective way to clean your microwave without risking any damage, go for safe, chemical-free alternatives like steam cleaning or vinegar solution!
You’re probably wondering if it’s safe to use a scouring pad when cleaning your microwave oven. Well, the short answer is that you can, but only under certain conditions! As an expert in microwave oven cleaning, I recommend avoiding abrasive sponges and pads as these could damage the surface of your appliance. Instead, opt for chemical-free steam cleaning or using a microfiber cloth with warm water for best results. This will ensure that there are no scratches on the interior walls of your microwave and that all germs have been effectively removed without any harsh chemicals coming into contact with your food.
When it comes to preventing food spills from sticking to your microwave oven, steam cleaning and grease removal are key. I recommend wiping down the interior of your appliance weekly with a damp cloth or paper towel to help remove any build-up before it has a chance to harden. Going further, you can also use a mixture of white vinegar and water for an effective deep clean that won’t damage the surface. It’ll cut through tough grease residue and leave your microwave looking sparkling clean!
Conclusion
In conclusion, keeping your microwave oven clean is not only important for hygiene but also for the longevity of your appliance. By following these simple steps, you can easily maintain a clean and odor-free microwave. So, say goodbye to splattered food remains and hello to a sparkling clean microwave!