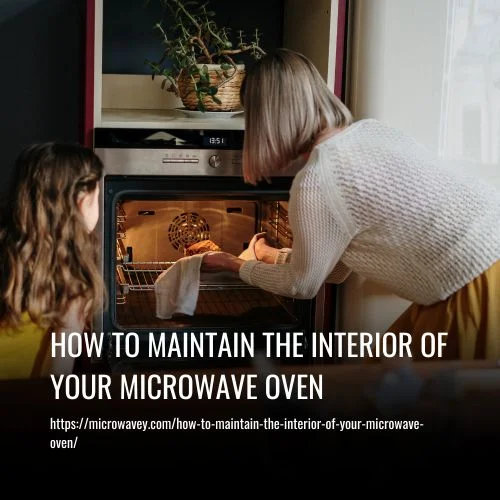
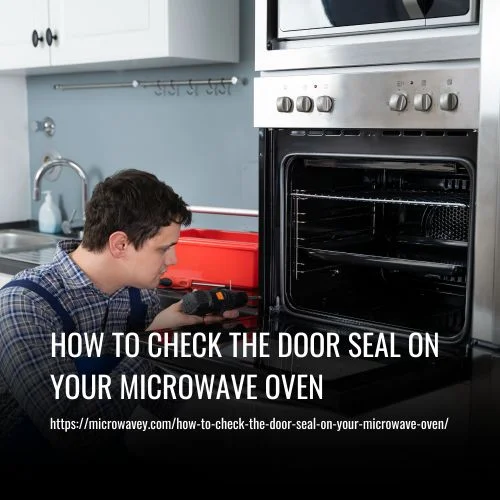
How To Check The Door Seal On Your Microwave Oven
Checking the door seal on your microwave oven is an important part of keeping it in good working order. As a appliance repair specialist, I know that even a small gap between the door and frame can cause heat to escape from the oven and reduce its efficiency.
How To Check The Door Seal On Your Microwave Oven, follow these Methods:
- The Visual Inspection Method.
- The Push Test Method.
- The Home Remedies Method.
- The Vacuum Test Method.
What Is A Door Seal?
It’s important to check the door seal on your microwave oven regularly, as it can be vulnerable to deterioration over time. The seal is made from a flexible material that fits around the edges of the appliance’s door and ensures an airtight closure when shut. Over time, however, this seal can become worn or cracked due to heat exposure or other causes.
This can lead to weakened insulation and reduced efficiency in the oven, so it’s essential to inspect your seals regularly for any signs of damage. It may even save you money in the long run if you catch potential issues before they become major problems!
1. The Visual Inspection Method:
Let’s start by inspecting the outside of your microwave oven, so we can check that the door seal is tight and secure. Once we’re happy with that, we’ll move on to inspecting the inside to make sure everything’s in proper working condition.
Inspecting From Outside
Start by opening the door and examining all around the edges for any signs of damage or unusual wear that could have caused it to lose its effectiveness over time.
If everything looks in order, close the door and look at the points where the door meets the frame – there should be no light coming through anywhere. That tight fit will ensure maximum seal longevity! So if everything checks out, your microwave oven’s seal should be just fine.
Inspecting From Inside
Now let’s move on to the inside inspection. You want to make sure there isn’t any suspect debris or degraded material that could be causing a leak in your microwave oven seal.
Start by removing all removable pieces, like shelves and trays, so you can get an unobstructed view into the interior of the machine.
Make sure you don’t miss anything – even small bits of food or grease can degrade over time and cause problems down the road.
Once everything is clean and looks good, replace all parts and close it up! That should do it for inspecting your microwave oven’s seal – now you have peace of mind knowing that it’s secure for years to come.
2. The Push Test Method:
The Push Test Method is a great way to check if your microwave oven door seal is functioning properly. It’s an easy process, and all you need is a piece of paper or tissue. Start by shutting the door on one side while sliding the thin paper between the gap in the door handle and body of the oven. The paper should not slide through easily when pressure is applied, as this indicates that there’s a tight seal which will help keep temperature control consistent inside your oven.
To ensure proper maintenance tips for your appliance, use the following table to test each corner of your microwave door:
| Top Left | Top Right | Bottom Left | Bottom Right |
|---|---|---|---|
| Apply Pressure with Paper? | Apply Pressure with Paper? | Apply Pressure with Paper? | Apply Pressure with Paper? |
| No Slippage? | No Slippage? | No Slippage? | No Slippage? |
If any area allows slippage it could indicate an issue with the seal – which means you may need to replace it. To do so, make sure you unplug your oven before attempting a repair, and follow manufacturer instructions carefully. Taking these simple steps now can save you time in the future!
3. The Home Remedies Method:
The Push Test Method is a great way to check the door seal on your microwave oven, but it’s not foolproof. The Home Remedies Method can complete the diagnostic process and help you assess whether or not the seal needs to be replaced. This method is simple: place a few drops of water around the perimeter of the door seal and leave for 15 minutes.
If any of the liquid has been absorbed into the seal material then this could indicate that some preventative maintenance is required. The best thing about this method is that it does not require special tools or knowledge; anyone can do it with minimal effort! By checking your seals regularly and completing this test when needed, you should have no problems maintaining an effective sealing system in your microwave oven.
So don’t wait until you notice a problem – make sure to keep up regular checks so your appliance stays running smoothly!
4. The Vacuum Test Method:
The Vacuum Test Method is the most reliable way to check your microwave oven door seal. It involves running a vacuum cleaner around the edges of the door, and looking for any surface level issues with it. If there’s any leakage from the seal, you’ll easily be able to detect it by this method.
It’s important to regularly test for these kind of issues, as failing to do so can have serious safety implications. So make sure that you carry out regular tests – especially if you notice any changes in performance or cooking times when using your microwave oven. Taking proper care of your appliance will ensure its longevity and help minimize potential problems down the line.
Why Is Checking The Door Seal Important?
Checking the door seal on your microwave oven is important to help reduce energy loss and improve safety. If the seal isn’t working properly, it can cause the appliance to be less efficient, as well as pose a risk to your home and family.
1. Reduced Energy Loss:
When it comes to energy efficiency and insulation benefits, checking the door seal on your microwave oven is essential. By making sure that it’s properly sealed and not damaged in any way, you’ll be able to ensure that no heat escapes from the appliance while it’s being used.
This can help cut down on wasted energy and save money over time; after all, why pay for something that isn’t going to actually benefit you? Taking a few minutes out of your day to check your microwave’s door seal could mean big savings in the long run!
2. Improved Safety:
Not only does checking the door seal help to improve energy efficiency, but it also helps with safety. Keeping a tight seal on your microwave oven will prevent any harmful electromagnetic radiation from escaping and potentially harming you or anyone in the vicinity.
This is why it’s so important that you check for any damage and replace worn seals as soon as possible – not doing so could lead to some serious health concerns! So if you want to make sure that you’re safe while using your microwave oven, double-check the door seal and make sure everything looks good.
Identifying Damage Or Gaps
When it comes to a microwave oven, checking the door seal is important for making sure your appliance operates efficiently and safely. It’s not just about keeping warm air in or cool air out – there can be serious consequences if you don’t keep an eye on this vital component.
Inspecting the door seal regularly will help you identify any damage or gaps that may have occurred over time. When it comes to repair costs, catching those problems early means you’ll save money by avoiding costly repairs down the road.
Here are some sealing tips to try:
- Check both sides of the door for damage such as tears or punctures in the rubber gasket.
- Make sure nothing is blocking the flow of air around the edges of your microwave doorway.
- Try pressing lightly along each edge of the door seal with your fingertips; any loose sections could indicate wear-and-tear due to age and use.
By taking a few minutes every couple of months to look at how well your microwave’s door seals, you can ensure proper operation and reduce potential repair costs further down the line. So take a moment now and give yours a checkup!
Cleaning The Seal
Alright, let’s get started on cleaning the seal on your microwave oven. First, I’ll need you to remove any debris that has built up on the seal. Be sure to get in those hard-to-reach spots! Next, I’ll want you to inspect the seal for any signs of damage. If you spot something, let me know right away. Finally, I’ll apply a cleaner to the seal to help keep it clean and free of debris.
Removing Debris
Before cleaning the seal around your microwave oven, it’s important to remove any debris that may be lodged in or around it. I suggest using a vacuum cleaner on its lowest suction setting to make sure you don’t damage the seal while removing dust and hair clippings.
Pay close attention to corners and edges, as these are often where moisture buildup can occur due to temperature fluctuations near them. Once all visible debris has been removed from the area, then you’re ready to move onto the next step!
Inspecting For Damage
It’s important to properly inspect the seal for any damage before you begin your cleaning process. Check for signs of wear and tear that could be caused by age or heat exposure.
Look at the composition of the seal, as seals are made of different materials with various lifespans. If there is visible cracking in the material or discoloration due to excessive heat, it may need replacing sooner rather than later.
It’s best to do this inspection now so you can make sure you’re doing everything possible to keep your microwave safe and secure!
Applying Cleaner
Now that you’ve inspected the seal, it’s time to apply some cleaner. Before dusting and mopping up any moisture, make sure to vacuum off all of the surface dirt first.
This will help ensure that your damp wiping cloth won’t spread around particles or debris which could get caught in the crevices of the seal. When applying cleaner, try using a soft brush or microfiber cloth with gentle circular motions so as not to damage the material.
Be mindful with how much liquid you use too; just enough for light dampening is enough to do the job! Make sure to rinse away any remaining residue after cleaning as well for best results.
With these tips in mind, you’ll be able to easily cleanse your microwave’s seal without any hassles.
Replacing The Seal
As an appliance repair specialist, I can tell you that replacing the seal on your microwave oven is not a difficult task to do yourself.
To give you some assurance of success before attempting this DIY repair, here are few tips:
- Make sure to check out what type of seal was used in the original construction and replacement parts should use the same kind or similar;
- When removing any old seals, be gentle and take care to ensure no damage occurs when taking apart the door itself;
- Take time to clean up around the edges where the new seal will go – dirt and dust could get caught between the frame and the seal resulting in air leaks.
Replacing a worn-out seal isn’t as complicated as it may sound at first. With patience, preparation and attention to detail, you’ll have your microwave’s door sealed back up in no time!
Testing After Repairs
Now that you’ve replaced the door seal on your microwave oven, it’s time to test and see if the repair was successful. The best way to do this is with preventative maintenance. Start by making sure all fasteners are secure and then open and close the door a few times. Look for any signs of gaps or air leaks around the edges of the seal.
If everything looks good, run a quick test cycle on the appliance to make sure it heats properly. It’s also important to keep an eye out for wear and tear over time to ensure proper operation of your microwave oven doors.
Regularly check for signs of damage such as tears or holes in the seal, and replace them immediately when necessary. Doing so will help avoid more extensive repairs down the line caused by poor sealing performance, saving you both time and money in the long run!
FAQs
Replacing a door seal on your microwave oven can be expensive, but it’s worth the cost when compared to potential safety hazards. It’s important to know the right drying techniques and safety precautions before attempting any DIY repair work.
As an appliance repair specialist, I always recommend making sure you have enough spare parts and tools in case something goes wrong. It’s also important to stay up-to-date with industry standards for proper sealing protocols so that your repairs are done correctly and safely.
It’s important to check your microwave oven door seal regularly, as a damaged seal can lead to potential health risks. Radiation exposure and humidity levels inside the appliance could be higher if there is reduced insulation from a faulty door seal.
This means that it may not be safe for you or your family to use the device in its current condition until the seal is replaced. So make sure you always inspect your door seals for signs of wear and tear, and replace them as soon as possible if need be – this will help keep everyone safe from any potential harm!
When it comes to checking your microwave oven’s door seal, you’ll need the right tools. Depending on the type of material used for the seal, a selection of screwdrivers, pliers and other hand tools may be needed.
You should also have an appliance repair specialist inspect the seal before performing any tests or maintenance as they’ll be able to recommend the best tools for the job.
Replacing the seal on your microwave oven after it has been cleaned is like giving a fresh coat of paint to an aging house – it can help prolong its life. Identifying signs that you need to replace the seal may be tricky, but with a keen eye and some basic tools, you can easily detect whether or not it’s time for a switch-up.
An appliance repair specialist can also quickly identify these signs, so if you’re feeling unsure, always take extra precaution by seeking professional advice!
When performing a push test to check the door seal on your microwave oven, it depends on what type of oven you have. Generally speaking, seals in newer models are designed with longevity in mind and can withstand more vigorous testing than older-style doors.
However, if you have an old model or one with a thin plastic frame, it is best not to perform the push test as this could cause damage and reduce the seal’s lifespan. Be sure to take into account the types of materials used for your oven’s door when considering how hard you should be pressing against the seal.
Conclusion
It’s important to check the door seal on your microwave oven regularly. Not only is it a safety issue, but it can also save you money in the long run. Replacing a worn or damaged seal may not seem like an expensive job, but those costs add up over time and are far better spent on preventive maintenance than repair bills.
Fortunately, performing tests on your door seal doesn’t require any specialized tools or knowledge—just some patience and attention to detail will do! By using the push test, which is available for all types of ovens, you can quickly determine whether there are any signs of damage that could compromise its effectiveness.
After cleaning your seal, if necessary, you may be able to extend its life by replacing it with a new one from your local appliance store. In short: checking your door seal should become part of your regular routine as an owner of a microwave oven.
Being aware of potential problems ahead of time allows you to take action early and avoid costly repairs later on down the line. With proper care and maintenance, you’ll have peace of mind knowing that your appliance is working securely and safely for years to come!