With just a few simple steps, you’ll have your microwave looking as good as new in no time. Let’s get started! It’s important to remember to unplug your microwave before beginning any kind of maintenance or cleaning routine. Safety first!
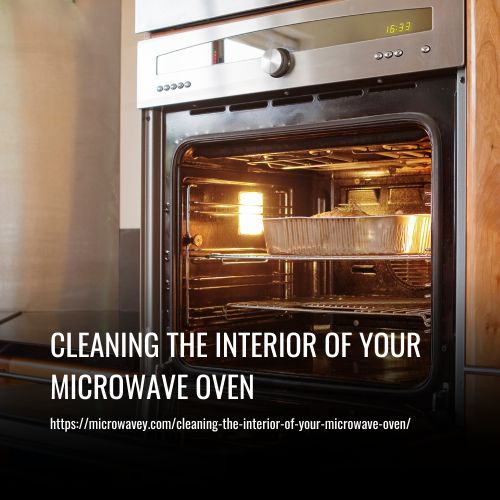
To Cleaning The Interior Of Your Microwave Oven, follow these steps:
- Gather The Required Materials.
- Unplug The Microwave.
- Remove The Accessories.
- Clean The Glass Turntable.
- Clean The Interior Walls.
- Clean The Exterior Surfaces.
- Wipe Down The Control Panel.
- Clean The Door Seals.
- Vacuum Out The Ventilation System.
- Reassemble The Microwave.
1. Gather The Required Materials:
Opening the microwave door and discovering a mess of melted cheese, spilled tomato sauce, and crumbs scattered all over can be daunting. But don’t worry! With some basic supplies and safety precautions you’ll have your appliance sparkling in no time.
Grabbing a pair of rubber gloves is essential before beginning any cleaning project to protect your hands from harsh chemicals.
Next, gather up an array of cleaning materials like sponges, cloths, baking soda, white vinegar, dish soap, and lemon juice (or other citrus fruits). Having these items on hand will ensure that tackling each mess doesn’t become too overwhelming. And remember – always keep proper ventilation when using chemical cleaners as they may produce strong fumes.
2. Unplug The Microwave:
First and foremost, it’s important to always practice safe cleaning techniques when dealing with any home appliance. Make sure to unplug the microwave before beginning the cleaning process, to avoid any potential electric shock. Next, you’ll need to gather the right supplies for the job. I suggest using a mild detergent and a damp cloth for the best results. Finally, there are a few techniques that’ll help you get the most out of your cleaning session. Scrub the interior in circular motions and don’t forget to wipe down the door and all the nooks and crannies. You’ll have a sparkling clean microwave in no time!
Safety Considerations
Safety is a priority when unplugging your microwave. It’s important to remember that these products are full of electricity, so it’s essential to take the proper precautions before attempting any cleaning or maintenance.
Make sure you turn off the unit at its power source and unplug it from the outlet – this will help ensure that no dangerous shocks occur while we’re working on the appliance.
Additionally, make sure adequate ventilation is present in the room where you’ll be carrying out repairs or replacements with alternative products.
Doing so can protect you against potential electric hazards as well as hazardous fumes which may escape during the process. So keep safety top of mind and always put precaution first!
Cleaning Supplies
Once you’re done unplugging your microwave, it’s time to start cleaning! To ensure the job is done correctly, it’s important that you choose the right type of cleaning solution.
You can either opt for eco-friendly cleaners or use a combination of water and vinegar as an effective cleaning agent. If disinfecting is necessary, then make sure to take extra precautions when using any harsh chemicals in order to avoid any potential hazards.
With all these considerations in mind, let’s get started on giving our appliance some well deserved TLC!
Cleaning Techniques
Now that we’re armed with the right cleaning solution, it’s time to get down to business and clean our microwave!
There are several techniques you can use when cleaning your appliance. For example, steam cleaning can be a great way to loosen up any grime and dirt without having to scrub too hard. Alternatively, if you’re looking for an eco-friendly option, then using some kind of natural cloth or sponge will do the trick just fine.
Regardless of which technique you choose, the main thing is making sure all surfaces have been thoroughly wiped down before putting everything back together again. So let’s get going and make this appliance sparkle like new!
3. Remove The Accessories:
First, you’ll need to remove the accessories from your microwave. This will include dismantling the tray and taking out any removable filters that may be present. Make sure to clean them with a damp cloth before putting them away for safe keeping.
Once all of these parts are removed, it’s time to give your microwave a thorough cleaning. Wipe down all surfaces with an appropriate cleaner or warm water and dish soap solution. Use a soft sponge or rag so as not to scratch up the interior too much!
Don’t forget to get in between all those little nooks and crannies – especially around the door seal – where food particles love to hide. And don’t forget about those nasty grease splatters on the ceiling either!
That should do it; now your microwave is ready for use again.
4. Clean The Glass Turntable:
Once you have removed the accessories from your microwave oven, it’s time to tackle the glass turntable. The first step is to prepare a soaking solution with warm water and mild detergent. This will help loosen any food or grease particles that may be stuck on the surface of the glass.
Take a damp cloth, dip it into this solution and use it to wipe down the entire inner area of your microwave oven – including the glass turntable. Make sure to clean both sides of the glass as some dirt can get trapped in between its grooves.
When cleaning is complete, rinse off all surfaces with fresh water and leave them to air-dry before returning everything back inside your microwave oven. With regular maintenance like this, you’ll ensure that your appliance remains hygienic and efficient for years to come!
5. Clean The Interior Walls:
First, let’s start with the basics. To clean your microwave oven interior walls, you’ll want to use a soft cloth and warm soapy water. Make sure to avoid abrasive cleaners or scrubbing brushes which could scratch the surface of your appliance. After wiping it down with this solution, rinse all surfaces thoroughly with clear water.
Next up are more advanced cleaning techniques – namely steam-cleaning and scrubbing methods.
Steam-cleaning is an effective way to remove built-up grease residue from your microwaves’ walls without having to resort to harsh chemicals or elbow grease! You can buy special tools for this purpose in most home improvement stores or online.
If that doesn’t suit you then using simple baking soda mixed with equal parts white vinegar should do the trick when scrubbed over with a sponge. As always be mindful not to rub too hard as this might damage the finish on your microwave oven!
6. Clean The Exterior Surfaces:
Now that the interior walls of your microwave oven are clean, it’s time to focus on the exterior surfaces. According to a recent survey carried out by home appliance experts, up to 75% of household dust particles often accumulate on the outside areas of microwaves and other kitchen appliances.
As a cleaning expert, I recommend using an all-purpose cleaner and microfiber cloths or paper towels to remove debris from these external surfaces. For tough spots, you can use a mild abrasive and repeat as necessary.
To eliminate any extra build-up, pay close attention to the nooks and crannies around control panels and handle edges too. Once all dirt is eliminated, you’ll be able to enjoy sparklingly clean results for your microwave oven!
7. Wipe Down The Control Panel:
When it comes to wiping down the control panel of your microwave oven, you want to make sure that no smudges are left behind. To avoid any unsightly streaks or marks, use a soft cloth and some all-purpose cleaner on the outside of the panel. Take care not to get any moisture into the electrical components – using an extra dry cloth can help prevent this from happening.
When finished with this step, simply wipe off any remaining residue with one of your clean cloths and you should be good to go!
Moving onto other areas inside of your microwave oven is easy enough now that everything has been wiped down and dried completely. Make sure to take special care when cleaning around buttons or dials so that nothing gets stuck or broken in the process. A microfiber cloth works great for avoiding scratches on these surfaces as well as preventing dust buildup between crevices.
Keep up with regular maintenance and cleaning sessions every few months and your microwave oven will stay looking its best!
8. Clean The Door Seals:
Now that the control panel is clean and sparkling, let’s move on to the door seals! It might seem like a small task but it can make all the difference in keeping your microwave oven hygienic.
To get started there are two essential steps you must take: scrubbing technique and steam cleaning. Scrubbing will help remove any built-up grease or grime from between the crevices of the seal. Steam cleaning is also important because this helps sanitize and deodorize any odors stuck in those same areas.
Here’s how to do both:
- Scrubbing Technique
- Start by using a wet cloth with mild soap to wipe away any loose dirt particles around the edges of the seal.
- Take an old toothbrush dipped into hot soapy water and use it to gently scrub away at stubborn stains within the ridges of the seal.
- Steam Cleaning
- Boil some water and add a few drops of lemon juice for extra cleansing power. Pour it into a bowl, then place it inside your microwave oven next to the door seal. Close the door securely shut and allow its steamy contents to work their magic for about 5 minutes before opening up again.
- Finally, dry off any remaining moisture from both sides of your now pristinely clean door seal with a kitchen towel or paper towels.
We hope these steps have helped you achieve spotless results without too much elbow grease!
9. Vacuum Out The Ventilation System:
If any debris accumulates in these areas, it can block airflow and cause a buildup of heat inside the appliance. This could cause damage to both your microwave and its internal components.
The best way to avoid this issue is by regularly vacuuming out the ventilation slots on the sides or back of your unit. Make sure to use an attachment with soft bristles so as not to scratch up the interior surfaces.
To ensure proper air circulation throughout your machine, do this at least once every three months. That will keep it running smoothly for years!
10. Reassemble The Microwave:
Now that the ventilation system has been vacuumed out, it’s time to reassemble your microwave oven. Start by replacing any parts you may have removed during cleaning, such as the top vent grille or door seals.
Once all of the pieces are back in place, give them a quick test run before continuing. Make sure everything is working properly and that no components are loose.
If something isn’t functioning correctly, take apart the appliance and replace those faulty parts with new ones. After this step is completed and everything looks good, your microwave should be ready for use!
FAQs
Cleaning your microwave oven can be downright daunting and overwhelming! But with the right techniques, deep cleaning your appliance has never been easier. Believe me when I say that steam cleaning your microwave is like a breath of fresh air – it will make you feel as if you have a brand new machine on your hands.
To ensure optimal performance and cleanliness, I highly recommend performing a thorough deep-cleaning weekly; this way, you’re sure to get rid of any lingering grime or food particles without having to worry about scrubbing too hard. With these simple steps in mind, you’ll soon be cooking up delicious meals for yourself and your family without worrying about dirt or bacteria build-up inside your trusty microwave oven!
When dealing with tough stains on the interior walls of your microwave oven, steam cleaning is a great method to use. To do this, fill a microwavable bowl with 1 cup of water and heat it in the microwave for 2 minutes until the water boils.
Take out carefully using mitts or an oven mit and then place it inside the microwave and close the door for about 5-10 minutes. The hot steam will help loosen up any dirt and grime from the surfaces which can be wiped away easily afterwards.
If you’re looking for a non-toxic or natural solution to clean your microwave oven, DIY recipes are the way to go. I recommend using baking soda as it is an effective and safe cleaner that can help remove tough stains from the interior walls of your appliance.
All you need to do is mix two tablespoons of baking soda with one cup of water until dissolved, then rub onto the surface with a damp cloth. This will make sure all surfaces are left chemical free after cleaning!
It is possible to use a wet cloth for deep scrubbing and odor elimination when cleaning the control panel of your microwave oven. However, it’s essential to remember that these surfaces can be delicate so you’ll want to be sure to treat them with care.
As an appliance expert, I recommend using a soft microfiber cloth dipped in warm water and mild detergent if you’re looking for effective but gentle results. This way, you can ensure that your control panel remains safe while still being thoroughly cleaned!
Yes, you can use vinegar to clean the door seals of your microwave oven. It’s important to keep them free from dirt and grime so that your appliance remains in good working order.
Cleaning frequency varies depending on how often you use it but I recommend using a damp cloth or a mild scented cleaner once every two weeks. You don’t need to overdo it; just focus on cleaning the rubber gaskets around each side of the door with a little bit of white vinegar for an effective clean.
Conclusion
So, you now know the basics of how to keep your microwave oven clean on a regular basis and what type of cleaning solutions are best for removing tough stains. With these tips in mind, I can confidently say that keeping your microwave oven clean is not only possible but also relatively easy. Using natural or non-toxic cleaners such as vinegar will ensure that no harsh chemicals come into contact with the interior surfaces while still getting rid of dirt and grime effectively.
Additionally, using a wet cloth to wipe down the control panel is safe and won’t cause any damage to its delicate components. My theory is that if you take care of your microwave oven by following these simple steps, it will last much longer than an appliance that has been neglected.