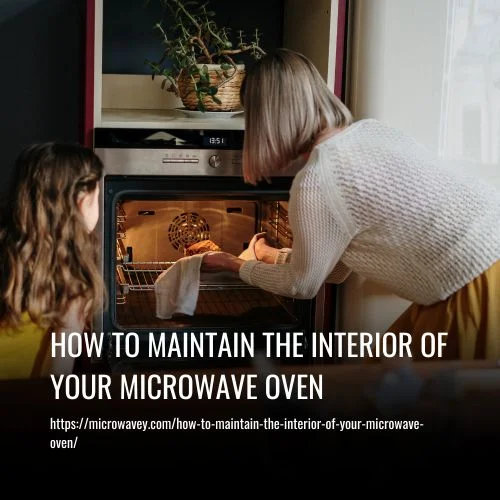
How To Maintain The Interior Of Your Microwave Oven
To maintain the interior of your microwave oven, follow these steps:
- Clean The Interior
- Remove Grease And Food Splatters
- Clean The Door Seals
- Deep Clean The Turntable
- Clean The Exterior
- Check The Ventilation System
- Inspect The Power Cord
- Check For Leaks And Cracks
- Ensure Proper Door Closure
- Regularly Replace The Charcoal Filter
How To Maintain The Interior Of Your Microwave Oven
1. Clean The Interior
When it comes to maintaining the interior of your microwave oven, there are some important steps to take in order to avoid stains and dusting surfaces. It is best that you start by wiping down the walls with a damp cloth or sponge on a regular basis. This will help prevent any food splatter from sticking onto the surface and causing damage over time.
You should also use an all-purpose cleaner when cleaning the interiors of your oven. Make sure to follow instructions carefully as different cleaners may require special dilution ratios before they can be used safely inside appliances. Additionally, if you notice any stubborn stains within your microwave oven’s interior, try using a mixture of baking soda and water for effective stain removal.
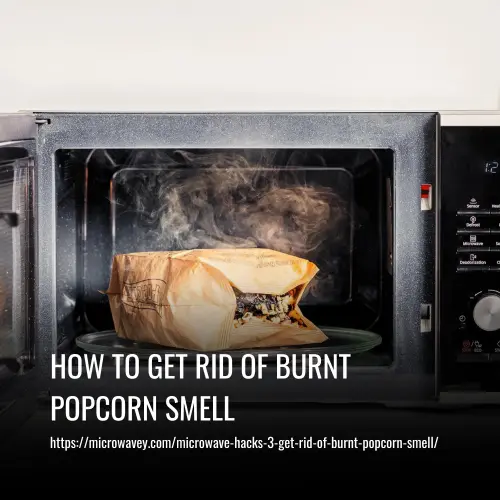
2. Remove Grease And Food Splatters
Removing grease from your microwave oven is a lot easier than you think! Just mix equal parts of vinegar and water in a bowl, then microwave it for about 5 minutes; the steam will help loosen the grease and make it much easier to wipe away.
Cleaning up food splatters can be a bit trickier, but it’s still possible. Start by wiping the area with a damp cloth, then use a gentle scrubbing brush and some warm, soapy water to get rid of any stubborn bits.
Removing Grease
When it comes to maintaining your microwave oven, one of the most important tasks is removing grease and food splatters. To help reduce fumes and prevent buildup, I recommend using a damp cloth soaked in a mild detergent solution after each use. Make sure that you reach all the nooks and crannies – don’t forget to wipe down the door handle too!
When you’re finished cleaning, dry with a soft cloth or paper towel so no water droplets are left behind. If grease has been sitting for some time, heating up vinegar can be effective at loosening it up before wiping away with a damp cloth. Taking these simple steps will ensure your microwave remains clean and working efficiently.
Cleaning Splatters
When it comes to cleaning splatters, there are some DIY solutions you can use. For deodorizing odors, try heating up a cup of vinegar in the microwave for a few minutes and then wiping away with a damp cloth. For tougher stains, use a scrubbing sponge or pad and non-abrasive cleaner to scrub them away.
Just make sure not to use any harsh chemicals that could damage your appliance – stick to gentle cleaners like baking soda or lemon juice. Once you’re finished cleaning, dry with a soft cloth or paper towel so no water droplets are left behind. That way, your microwave will stay clean and working efficiently!
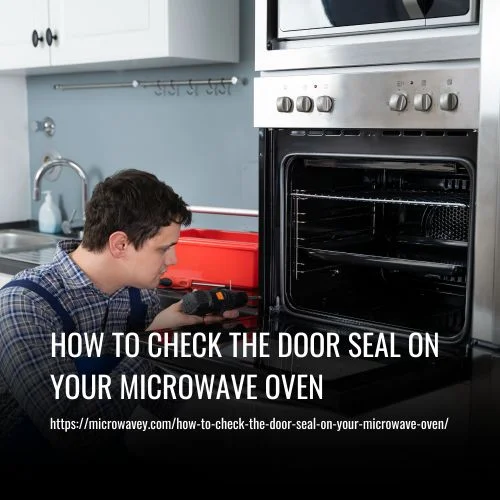
3. Clean The Door Seals
Now that you’ve taken the time to remove grease and food splatters from your microwave oven, it’s important that you clean the door seals routinely. The rubber seal around the edges of your microwave helps keep heat and steam inside so if this becomes dirty or cracked, replace it immediately.
You should also ensure that these seals are regularly cleaned in order to maintain a hygienic environment for cooking. Here is an easy-to-follow checklist on how to properly clean your microwave door seals:
- Unplug your appliance before cleaning any parts
- Use a mild detergent and warm water to wipe down the exterior of the seals
- Check for signs of cracking or damage
- Replace seals as needed
Regular maintenance of your microwave oven will help extend its life span while preventing potential health risks associated with unclean surfaces. Be sure to inspect all components of your microwave periodically and tackle any problems quickly so they don’t become more serious issues later on!
4. Deep Clean The Turntable
To deep clean your microwave oven’s turntable, you’ll need to start by removing it and the plate from the machine. This is usually a simple process; just remove any screws holding it in place if needed, then lift out the tray.
Once removed, use warm soapy water and a soft sponge or cloth to scrub down both parts before wiping them dry with a separate clean towel. If there are any cracks or chips on either piece, you may want to consider replacing either the plate or wheel for safety reasons. That way, your turntable will be able to function properly without causing harm or damage when spinning food around inside the microwave.
You should also make sure that all of its components are securely fastened back into place when re-installing it into the machine. With these steps followed correctly, your microwave oven’s turntable should remain in good working condition for many years to come!
5. Clean The Exterior
It is important to maintain the exterior of your microwave oven in order to keep it looking new and avoid dust, dirt, and other debris from entering. Here are a few tips for keeping the outside of your appliance clean:
- Wipe down with mild soap and warm water on a regular basis; make sure to rinse thoroughly.
- Avoid using abrasive sponges or scouring pads as these can leave scratches or damage the finish.
- Use glass cleaner to remove any stubborn smudges or fingerprints that may have been left behind after use.
- Remember to also avoid leaving anything acidic like tomato sauce on surfaces for too long as this could cause permanent stains and buildup over time.
These simple steps should help you keep your microwave oven looking great while helping you avoid damaging it due to improper cleaning methods.
6. Check The Ventilation System
Ventilation systems in microwaves are important to maintain, as they help reduce the amount of dust and dirt that can enter your oven. To keep it working properly, we need to check the ventilation system regularly.
When inspecting the vents, look for any buildup of grease or food particles on the filters, grilles, and fan blades. The filters should be cleaned with a damp cloth every couple of months and replaced if necessary. You should also clean out any debris from the vent itself using compressed air or a vacuum cleaner. Finally, make sure there is no obstruction blocking airflow through the vent – this could lead to overheating and cause fire hazards.
| Task | Procedure |
|---|---|
| Check Ventilation System | Inspect all components including filter, grills & fan blades; remove build-up with damp cloth; use compressed air/vacuum to clear debris from vent; ensure adequate airflow > avoid overheating & fire hazard |
7. Inspect The Power Cord
Have you ever thought about the inside of your microwave oven? If not, it’s time to take a look and inspect what is going on in there. Here are some steps that will help ensure your appliance remains healthy and safe:
- Test wiring:
- Check for exposed wires or frayed cords.
- Ensure all connections are tight and secure.
- Check voltage:
- Make sure that the power cord is emitting the correct voltage rate.
- Replace any faulty parts before turning the device back on.
The interior of your microwave should be inspected regularly; this way, you can keep up with maintenance and make sure no damage has been done over time. By following these tips, you should have a functioning appliance for many years to come!
8. Check For Leaks And Cracks
I’ll start by talking about inspecting the vents. It’s critically important that you take a close look at your microwave oven’s ventilation system each time you clean it, as this is what prevents steam from building up inside of the appliance and damaging its components. You should make sure the vents are free of dust and debris, which can block air flow, cause overheating problems, or even catch fire if not taken care of properly.
Next, I’d like to emphasize replacing gaskets if necessary. Gaskets help seal in heat so that energy isn’t wasted while cooking. Over time they may become worn out or damaged due to everyday use; when this happens, they need to be replaced right away with an identical replacement part for optimal performance. With proper maintenance and upkeep of these two parts, your microwave oven will keep running smoothly for years to come!
9. Ensure Proper Door Closure
Maintaining the interior of your microwave oven starts with ensuring proper door closure. It’s just like a castle gate, in that it must be checked regularly to make sure it’s secure and functioning properly. Here are 3 things you should check:
- Check the alignment of the hinge – if it is misaligned, you’ll need to adjust or repair it
- Test the closure – press on the door handle and make sure it closes securely without any gaps
- Make sure there are no obstructions blocking the door from closing correctly.
Keeping these three items in mind will help ensure your microwave runs smoothly for years to come!
10. Regularly Replace The Charcoal Filter
Good job on making sure your microwave oven door is closing properly. Now let’s move onto replacing the charcoal filter. Depending on how often you use your microwave, it’s recommended that you replace the filter anywhere between 6 months to one year. The type of charcoal filter will vary depending on the model and make of your oven so be sure to consult with a professional before purchasing any new filters.
It’ll also save you time by getting exact instructions for replacement when talking to an expert rather than searching online yourself. So don’t forget: know when it comes time to replace the filter, what kind of filter to get, and who can help if needed!
FAQs
When it comes to maintaining your microwave oven, you should be aware of how often you need to clean it. Cleaning frequency is key to ensuring the safety and proper functioning of your appliance. As an appliance repair expert, I recommend cleaning your microwave oven at least once every month or two. This will help remove any food particles that may have gotten stuck inside, as well as reduce your risk of fires and other potential dangers associated with a dirty machine!
When it comes to cleaning your microwave, the type of products you use is important. For general cleaning, mild detergents or warm soapy water should do the trick. If there’s an odor in your oven, try using a lemon-scented solution like vinegar and baking soda as they are great for neutralizing odors and leaving behind a pleasant smell. Alternatively, you can purchase special cleaning solutions specifically designed for getting rid of stubborn stains and bad odors from microwaves. Just make sure that whatever product you’re using won’t damage the inside of your appliance!
It’s safe to use a steam cleaner on your microwave oven as long as you take the proper precautions. Make sure to remove any food splatters and other debris before using the steamer, and be careful not to leave too much moisture in the interior of the appliance. Afterward, use drying methods such as wiping down with a dry cloth or paper towel to make sure no water is left behind that could cause damage later on. As an appliance repair expert, I would recommend taking extra caution when using a steam cleaner on your microwave oven.
When it comes to cleaning the door seal on your microwave oven, it’s important to be careful. You should never use a steam cleaner – instead, opt for antibacterial wipes or a damp cloth with some dish soap. Make sure you get into all the crevices and rid them of any food particles that could cause bacteria to build up and make your oven smell bad. Cleaning this part regularly will help keep your microwave in top condition!
It is necessary to replace the charcoal filter regularly. The longevity of the charcoal filter depends on how often it’s used and cleaned, so cleaning frequency should be taken into consideration. Generally speaking, most filters will last about a year if properly maintained. However, for best results you may want to change your charcoal filter every 6 months. Keeping up with regular maintenance like this can extend the life of your microwave oven significantly!
Conclusion
In conclusion, by following these simple tips on how to maintain the interior of your microwave oven, you can ensure that it remains clean, odor-free, and safe to use. Taking care of your microwave not only prolongs its lifespan but also helps you cook and reheat food more efficiently. So, remember to regularly clean, cover, and avoid using metal objects in your microwave to keep it in tip-top shape. Your future self will thank you for it!